
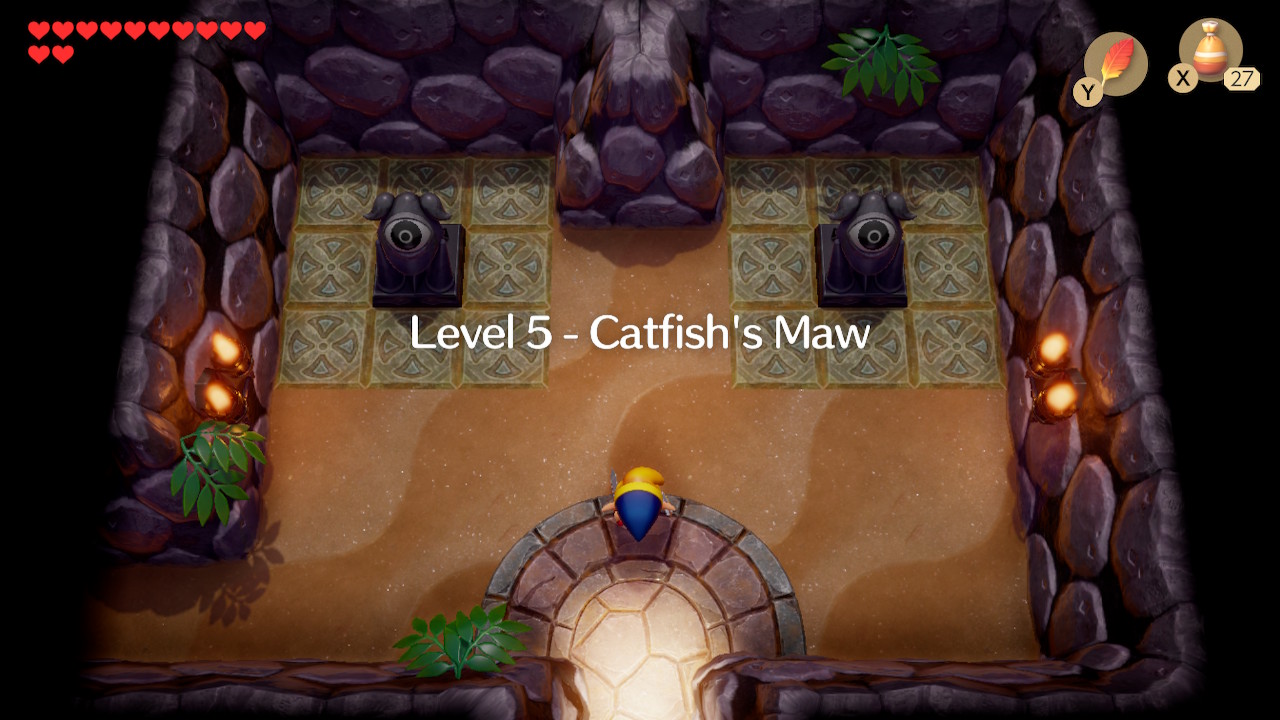
Part 5: Catfish's Maw
Wandering Ghost
Now that we have the flippers, a lot has opened up for us in the overworld. From the entrance of Angler's Tunnel, swim east until you reach the entrance of a cave. Enter inside and dive down to collect Piece of Heart #18. Now swim back west past the entrance of the dungeon we just completed. There's a cave entrance decorated with two fish carvings. Enter this cave.
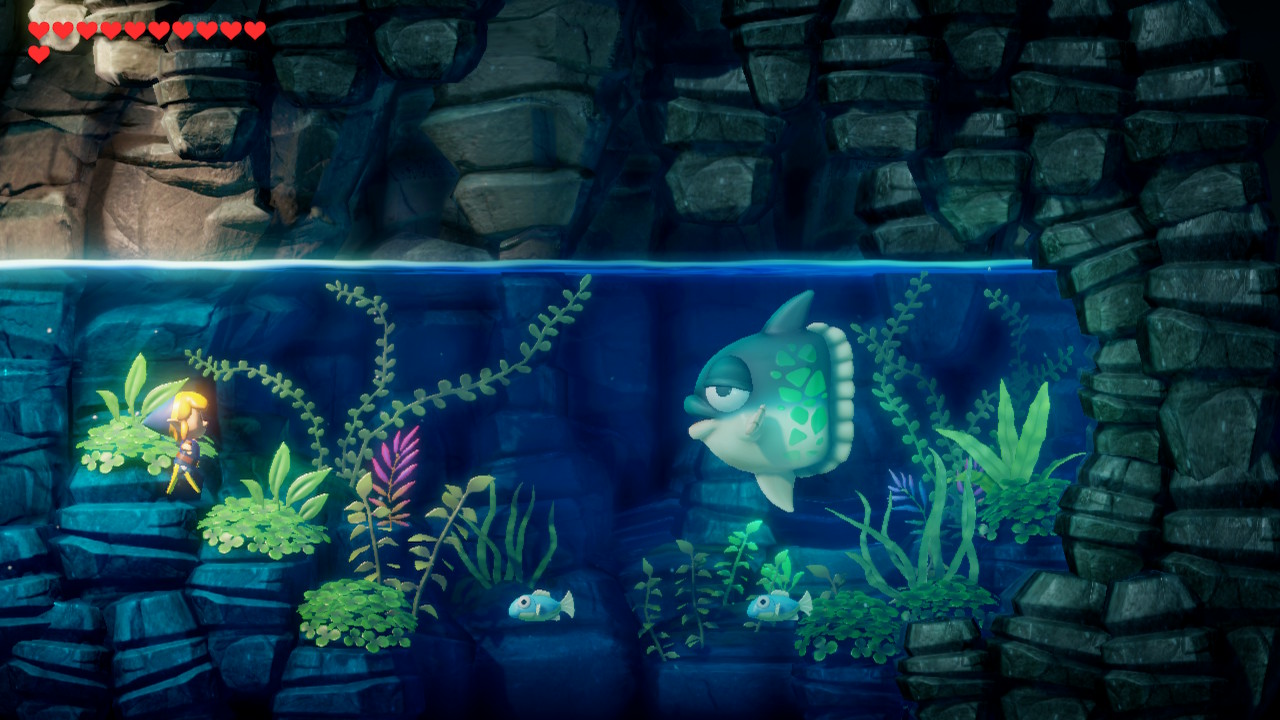
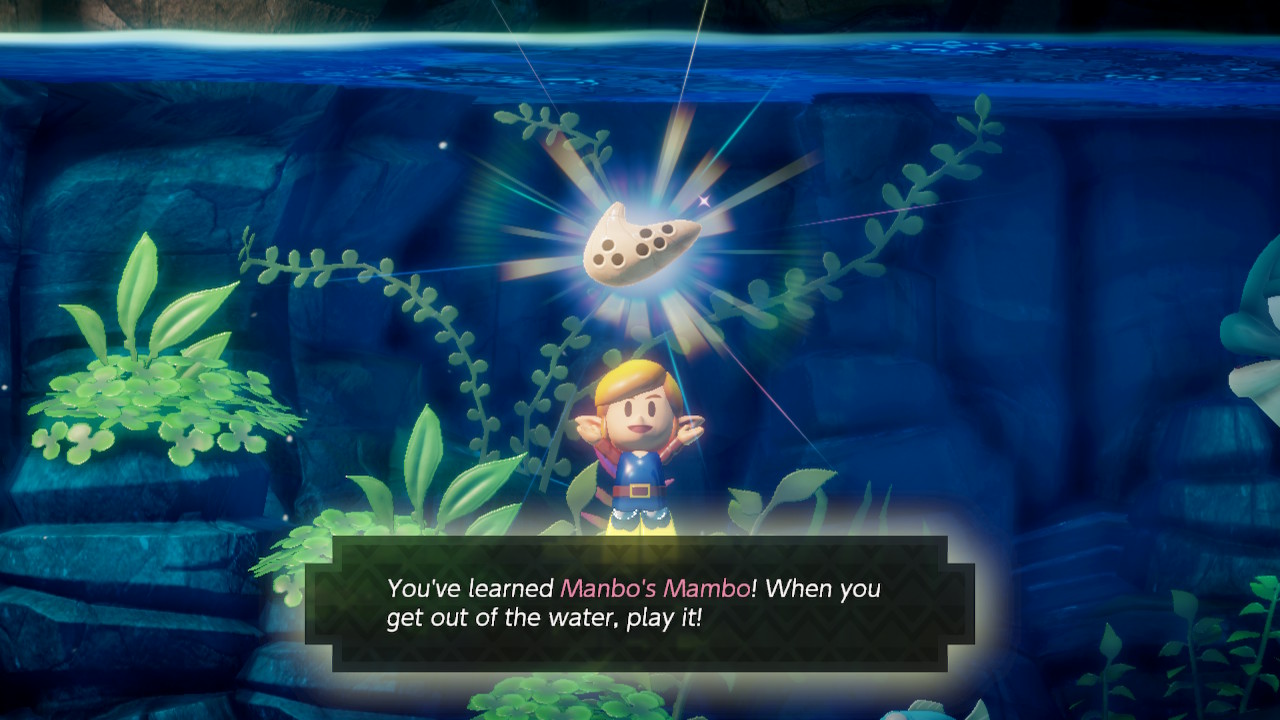
Here you'll find Manbo, child of the Sun Fish. He'll teach you a song on your ocarina called Manbo's Mambo. It can be used to warp to any known warp point on Koholint Island. If played in a dungeon, you'll be taken back to the entrance. This will be a very useful song. He'll also set a warp point to Manbo's Pond for you.
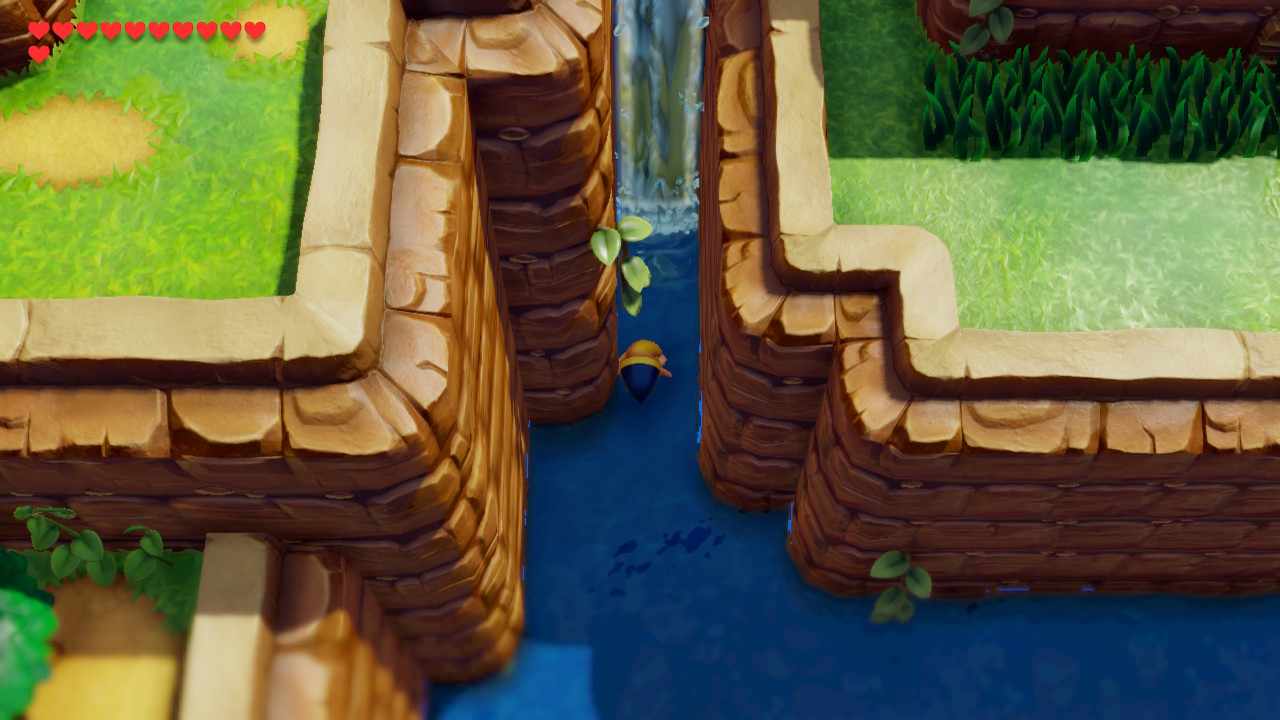
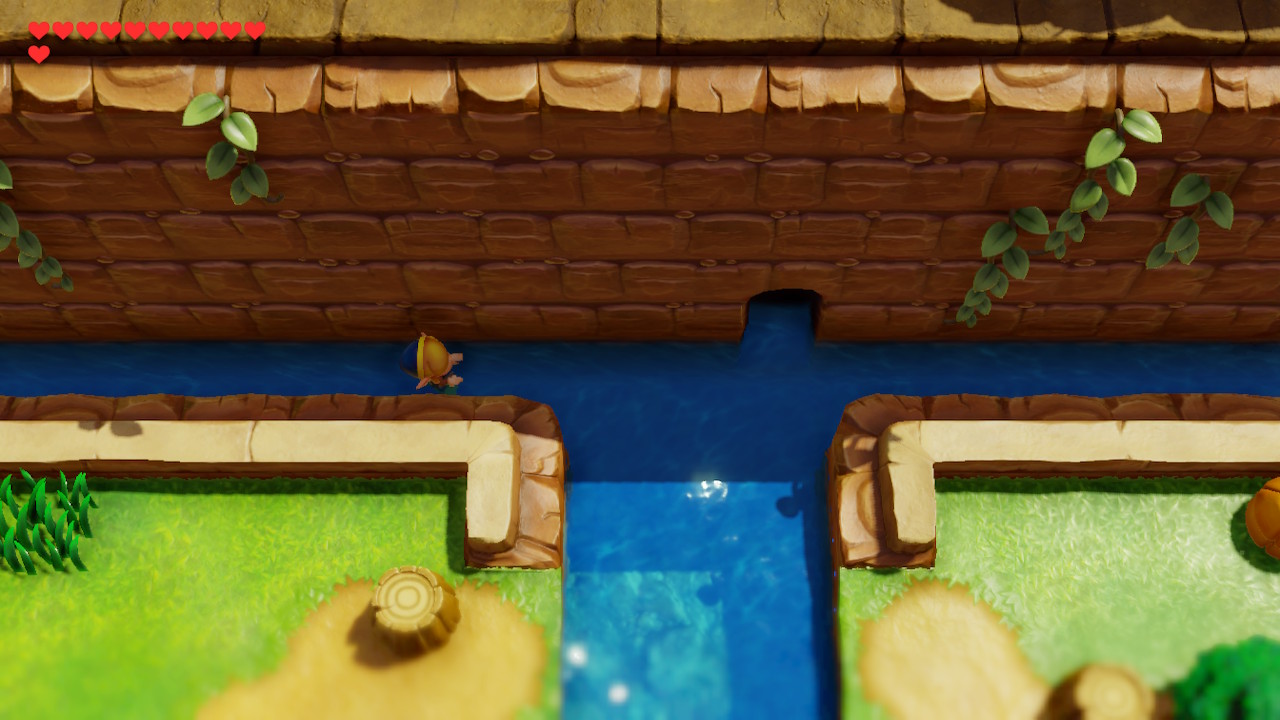
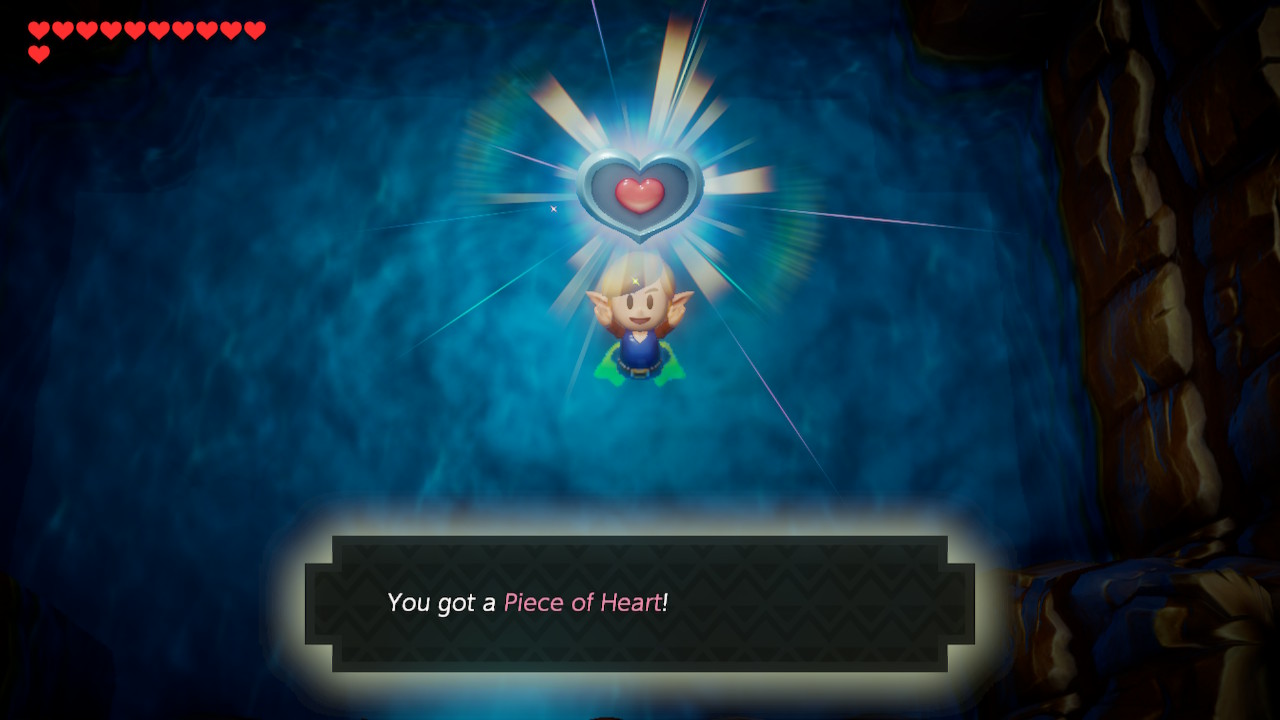
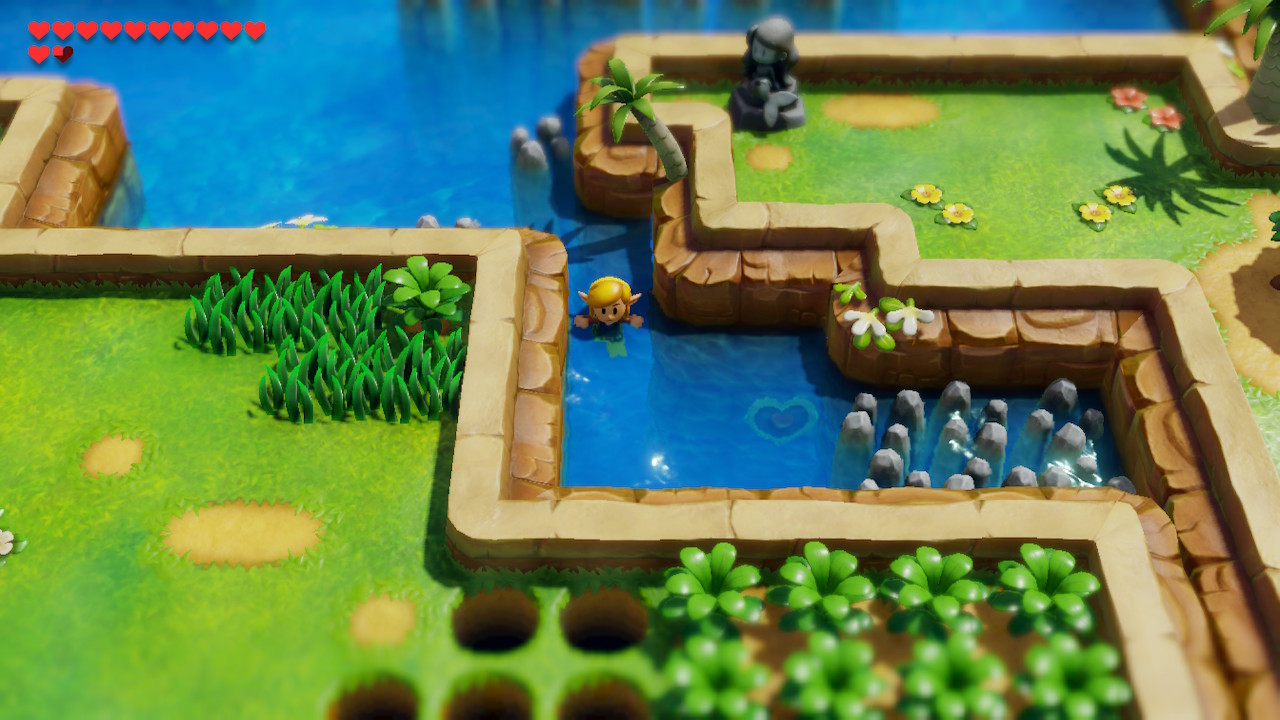
Continue swimming west from here until you hit a wall. Go south down the waterfall. Directly under the waterfall, you can dive to pick up Secret Seashell #31. Continue swimming south around the moat of Kanalet Castle. You'll probably notice that you are being followed by a pink ghost. We'll deal with that in a moment. First, swim east towards the the castle drawbridge and dive down to find Piece of Heart #19.
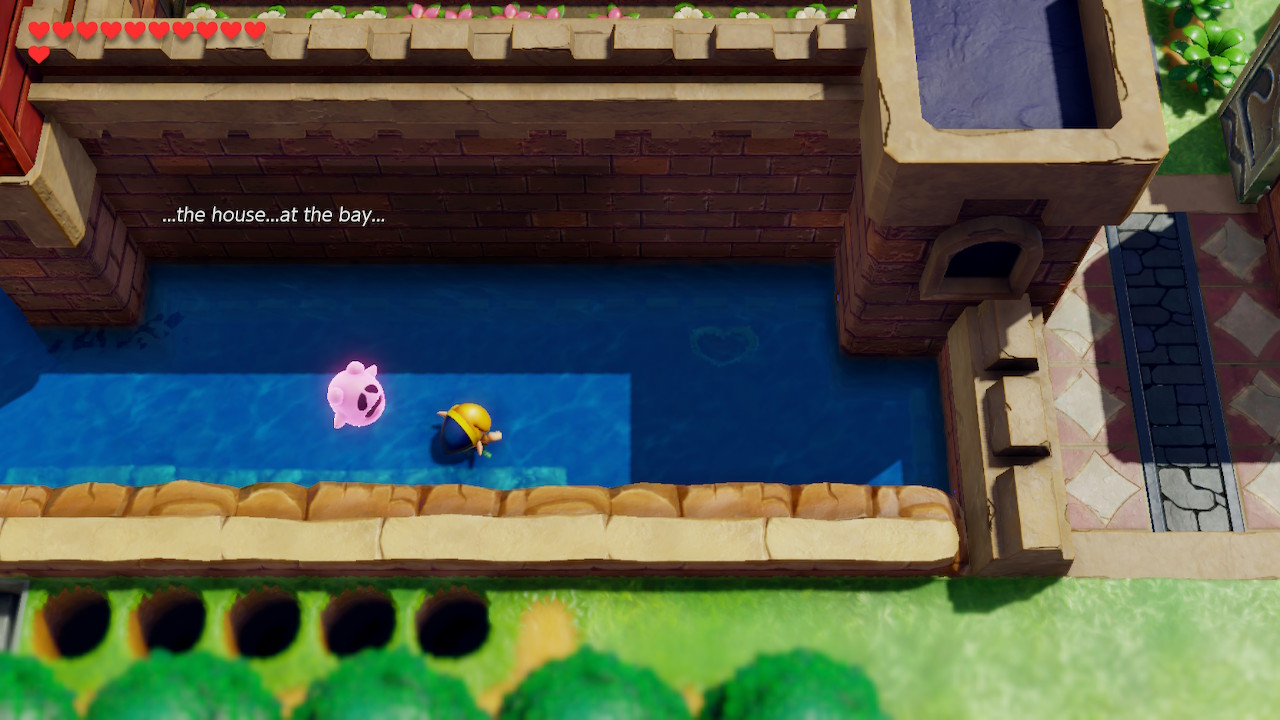
The ghost will mention that he wants to be taken home to his house near Martha's Bay. You'll need to head north and then east before you can hop out of the moat and onto dry land. Once you're out, play the newly acquired Manbo's Mambo and take the Martha's Bay warp point. Head south a bit and make the leap over the three pits using Roc's Feather and the pegasus boots. Enter the house you find.
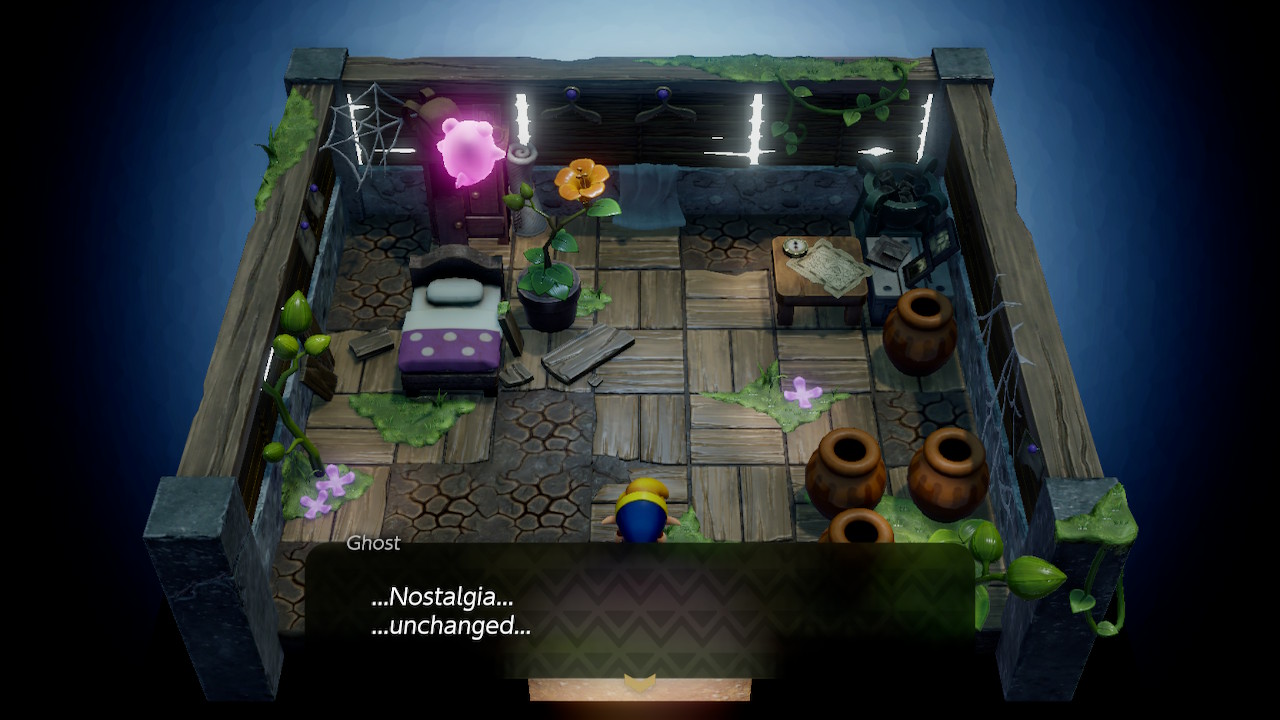

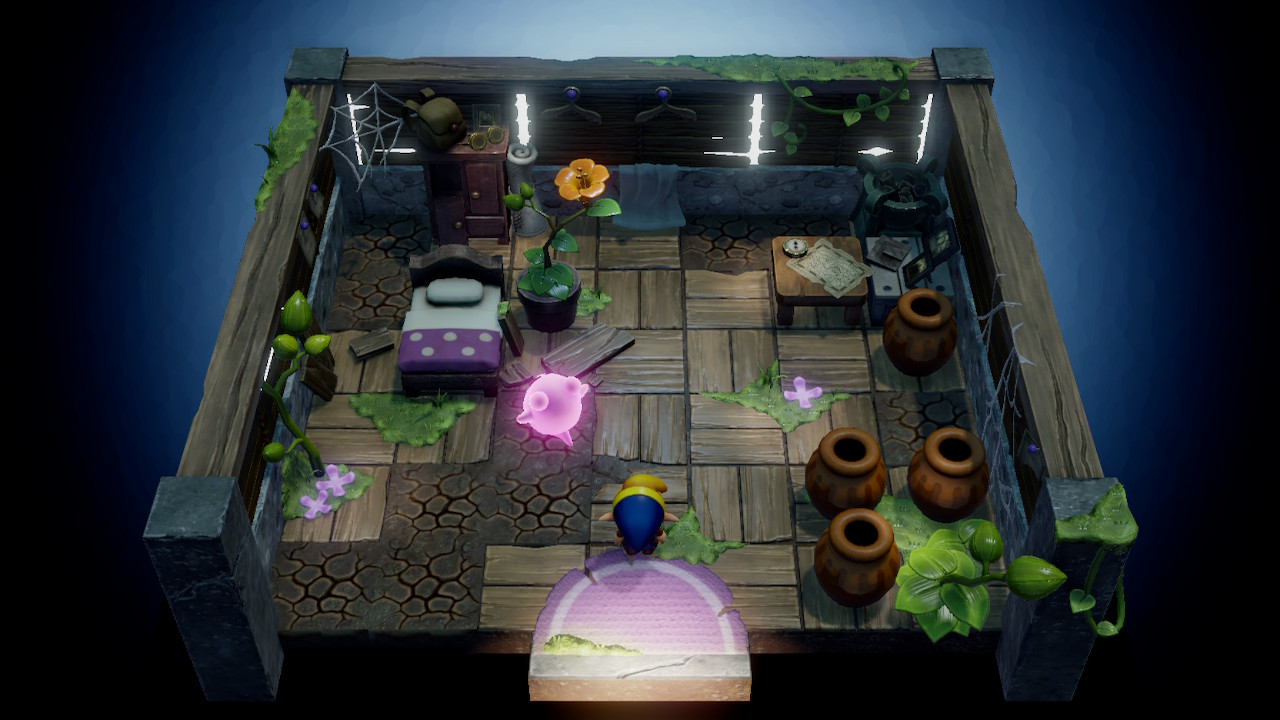
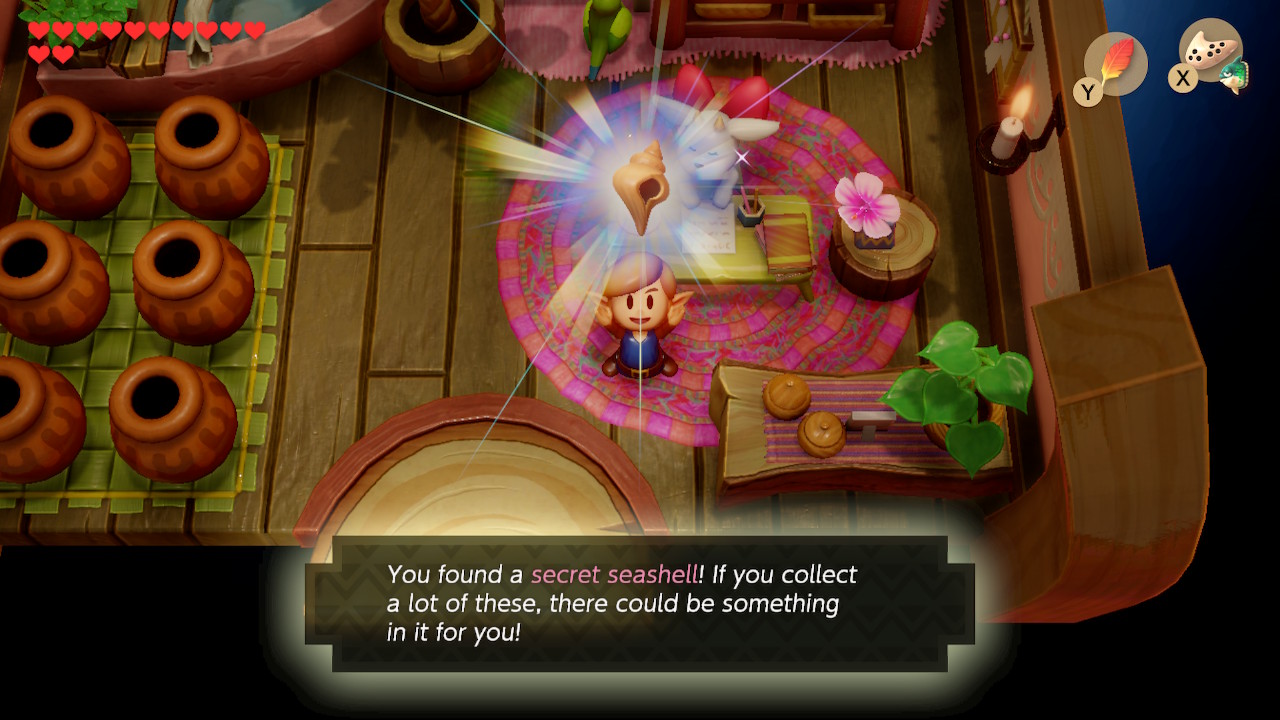
After reminiscing for awhile, the ghost will request that you take it back to its grave. Before doing so, check out the pots in the bottom-right corner of this room. Break them to find Secret Seashell #32. We want to take the ghost back now, so play Manbo's Mambo and warp to Manbo's Pond.
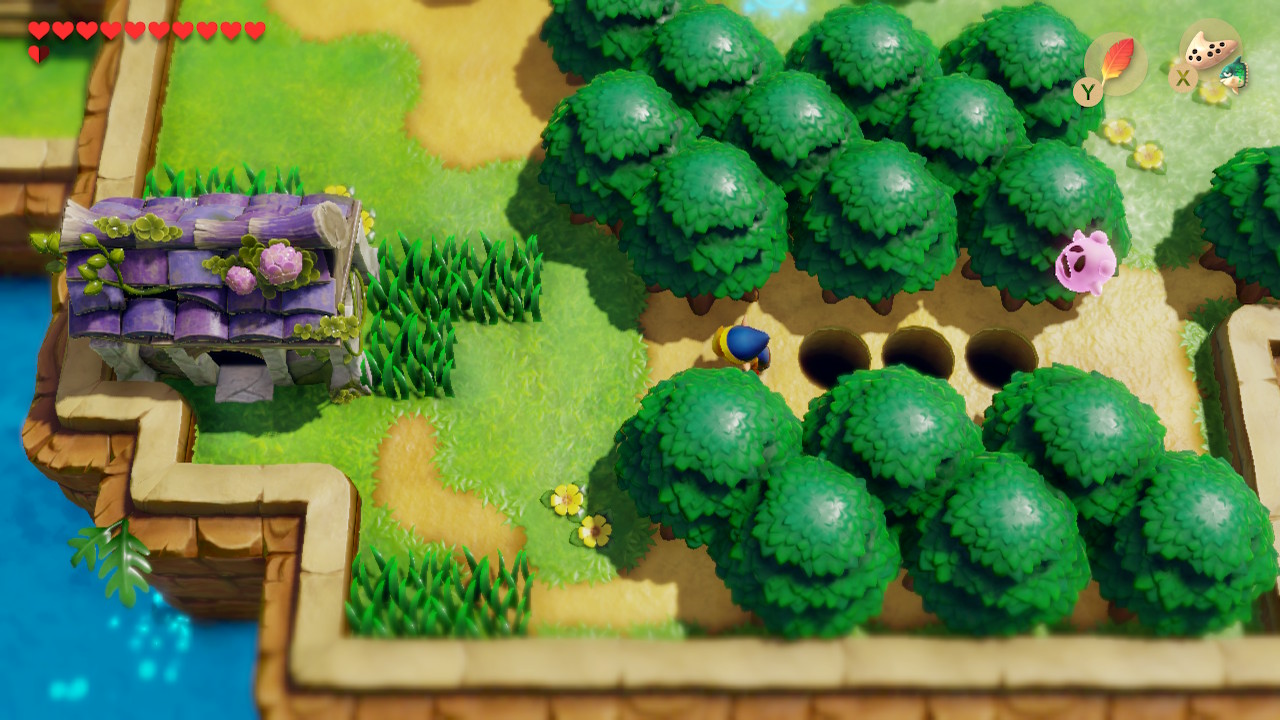
From here, head south to the Witch's Hut and west over the pits. The grave is the one surrounded by the flowers that you can see to the west. Move the boulder and head over to it. The ghost will thank you for returning it to its resting place with Fairy Bottle #2. The owl will then come an advise that to enter the next dungeon, Catfish's Maw, you must jump into the water at Martha's Bay. Head there right now if you wish, but there's plenty of goodies we can collect before then.
Trade and Collect
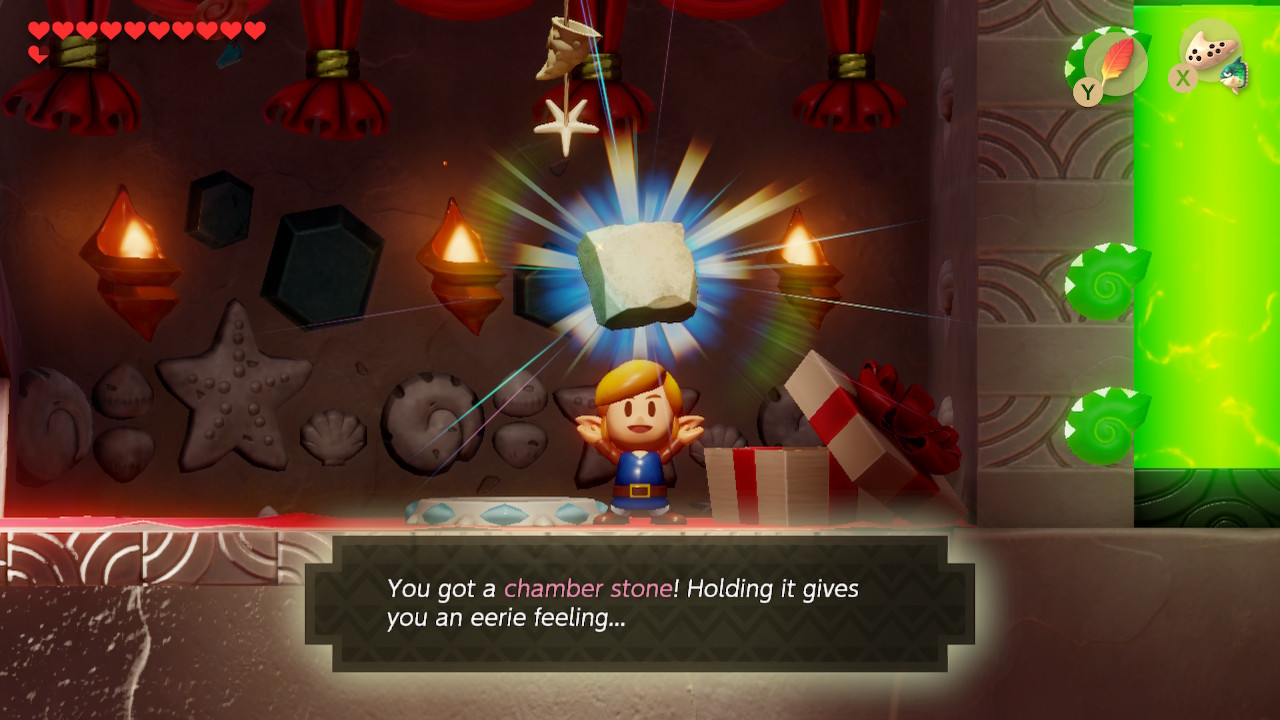
With the flippers in hand, we now have access to more Heart Pieces, Secret Seashells, and Trade Sequence items. To start off, play Manbo's Mambo and warp to Seashell Mansion. If you have over 30 shells, you can collect a Chamber Stone as a reward here. Head south and wrap around the trees to the staircase we used to first cross to the east side of the map. Go down and dive in the water to grab Piece of Heart #20.

Exit the cave and head south to find yourself back at Animal Village. In the top-right corner of the village, there are two similar looking buildings. Enter the left and speak to Christine to trade your hibiscus for a Goat's Letter. Now, play Manbo's Mambo and warp to Ukuku Prarie. Head south and wrap around Pothole Field to get to the water near the entrance to Key Cavern. Hop onto the island here and cut the lone bush to find Secret Seashell #33.

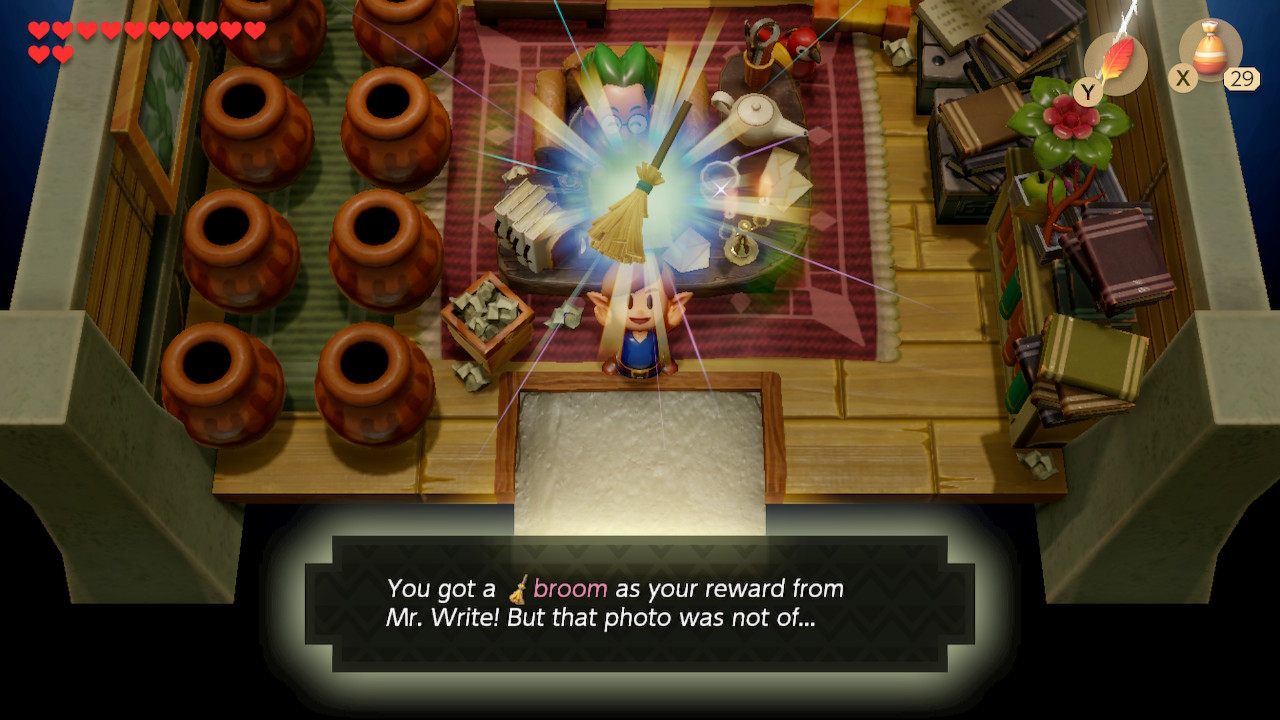
Let's go deliver the Goat's Letter now. Make your way back to Mabe Village and north to the Mysterious Forest. Cut all the way north through the forest and exit to the northwest. You'll see a house on the other side of the pits here. Inside is Mr. White, who will trade you the letter (containing a photo of Princess Peach) for a Broom.
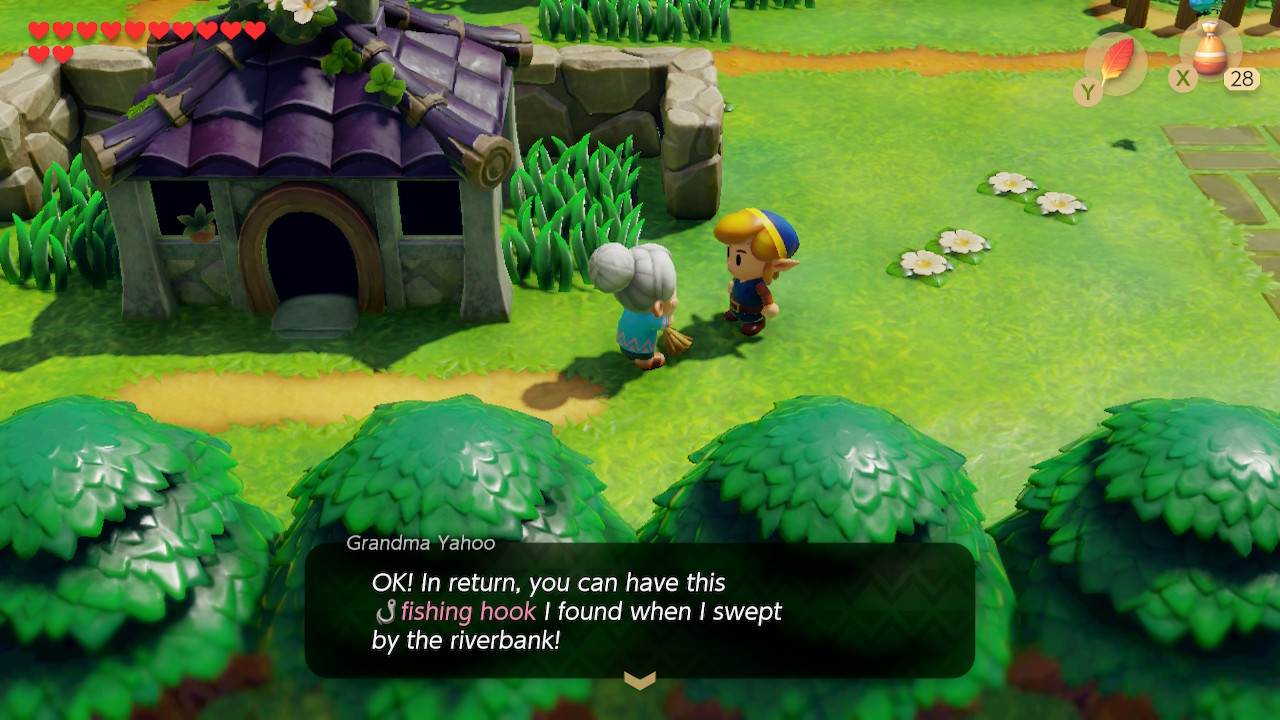
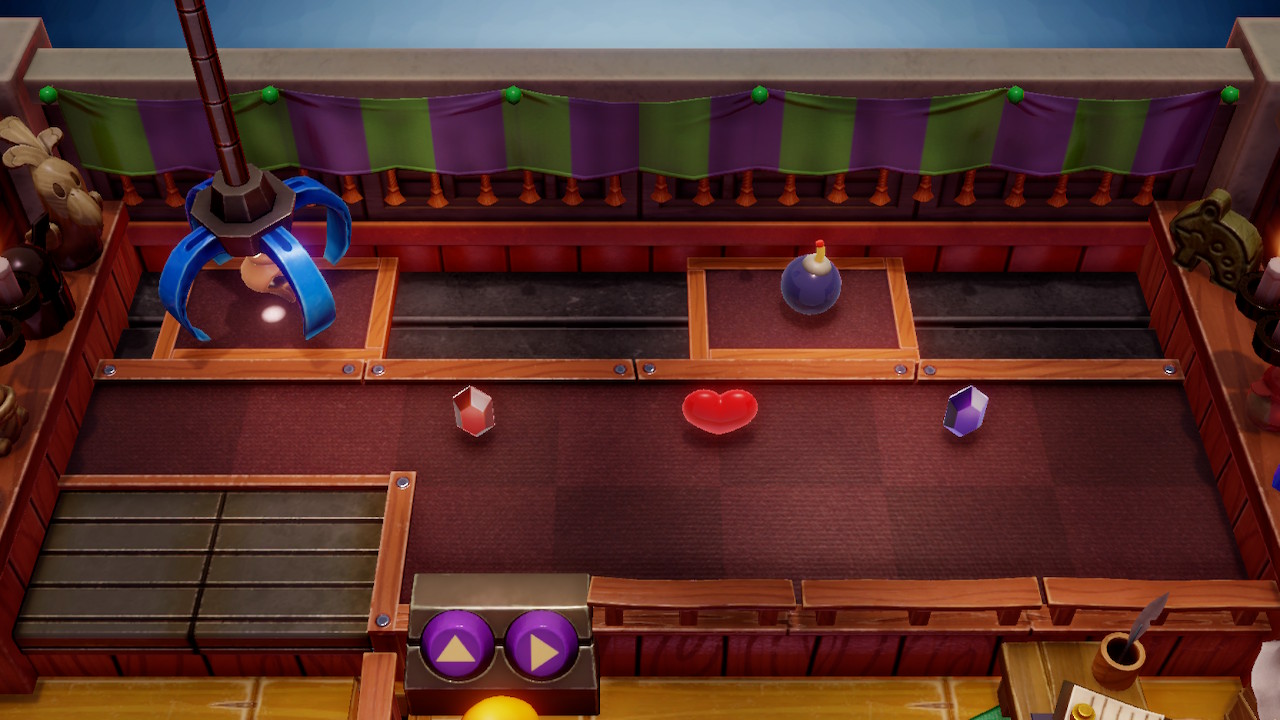
Head back south to Mabe Village. On the south side of town, speak to Grandma Yahoo standing outside the house with a purple roof. Trade her the broom for a Fishing Hook. Now, head back to the Trendy Game building to the east. You'll see Secret Seashell #34 is now up for grabs. Play the game until you get it.
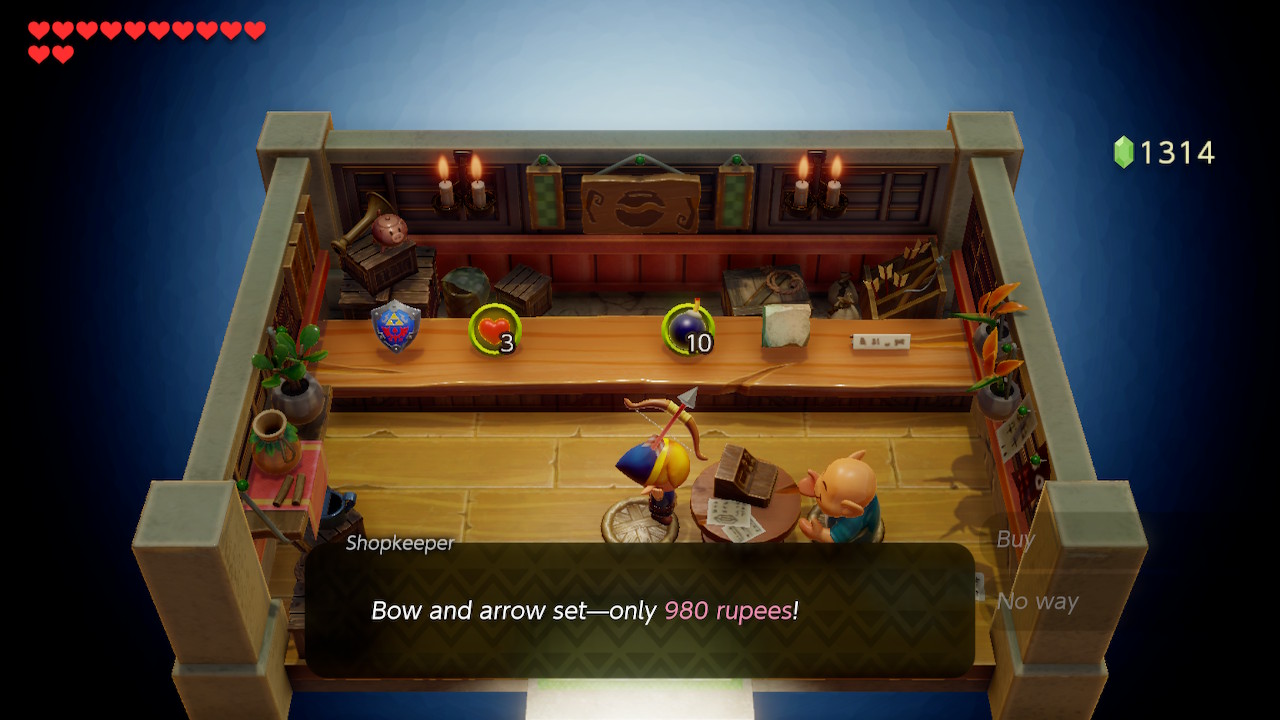
Now is a good time to purchase the bow from the shop in the village. It isn't necessarily required at this point, but you likely have enough rupees for it and it will allow us to access some optional rooms in the next dungeon. It'll cost you a whopping 980 rupees. You do have the option of stealing this item, but don't expect to ever be allowed in the shop again afterward.
Now, let's warp to Animal Village and pay Christie another visit. She is again in the left building in the top-right of town. Speak to her and she'll reward you with Secret Seashell #35 for delivering her letter.
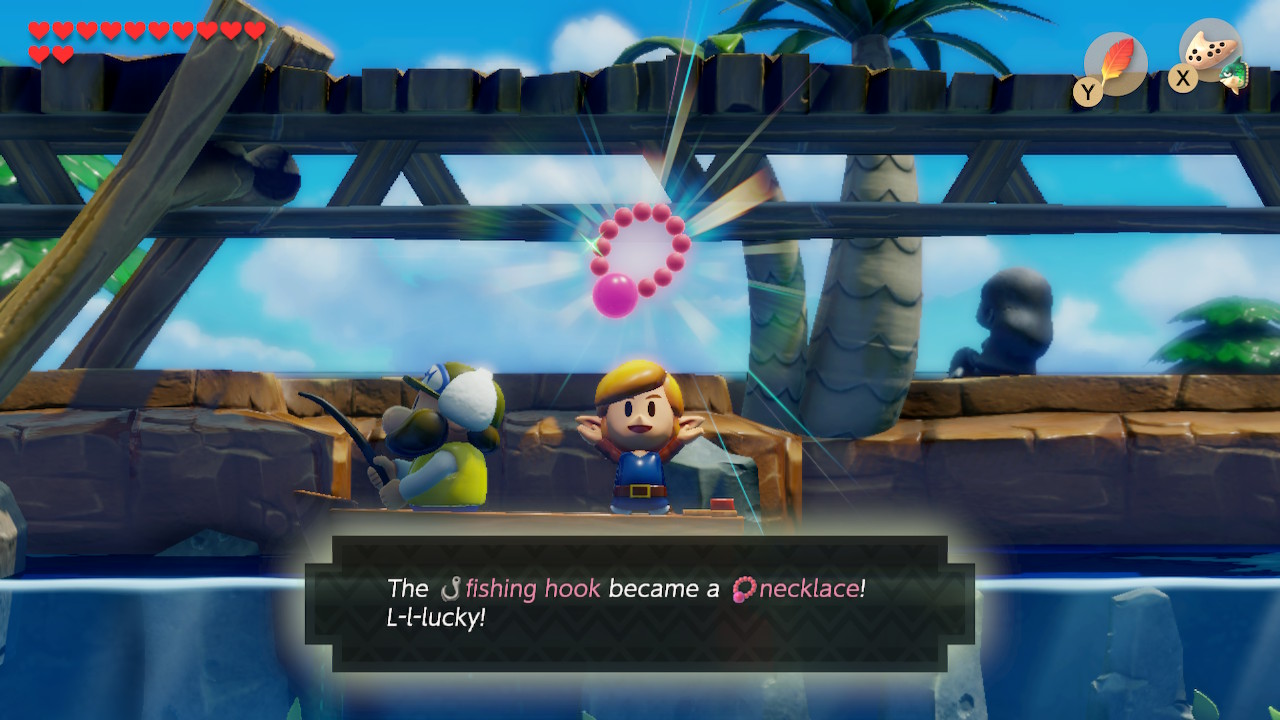
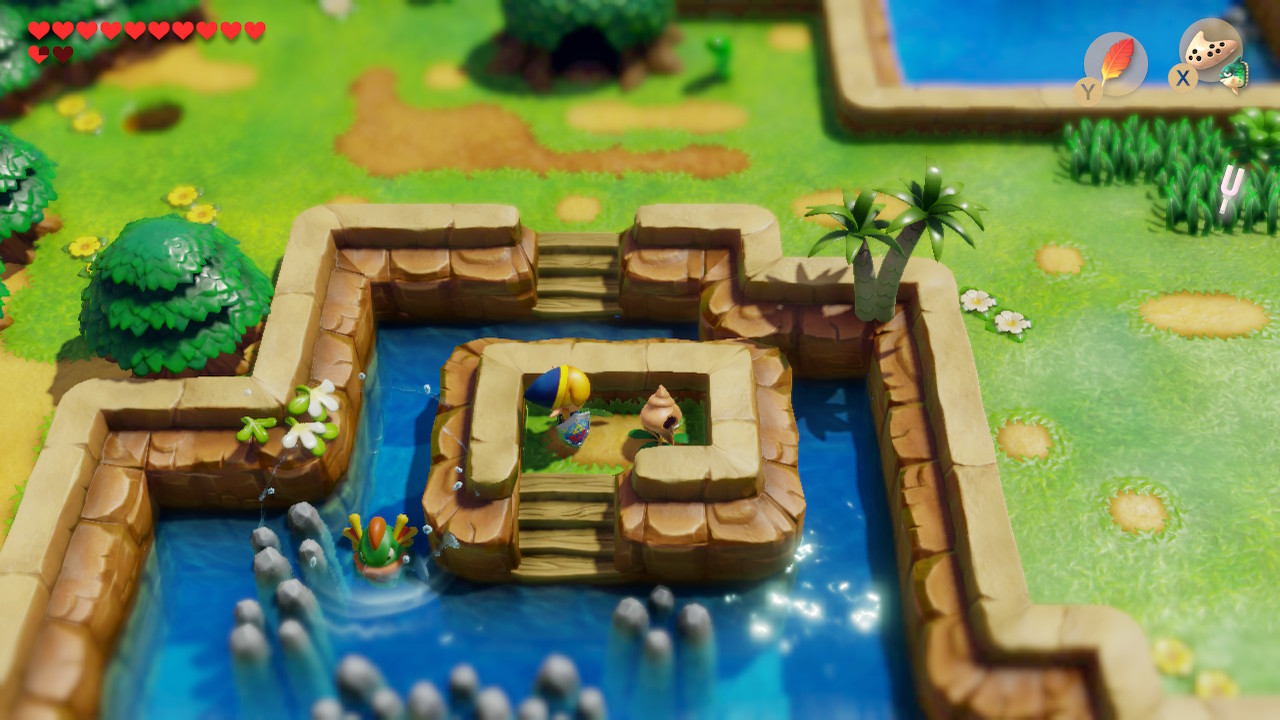
Head west of Animal Village into Martha's Bay. Get to the other side of the trees and hop into the water using the ladder. Swim south and go under the bridge that connects the main land to the small island with the owl statue. You'll find a man sitting in a boat who will offer you his next catch for your fishing hook. Agree and you'll get the Necklace.
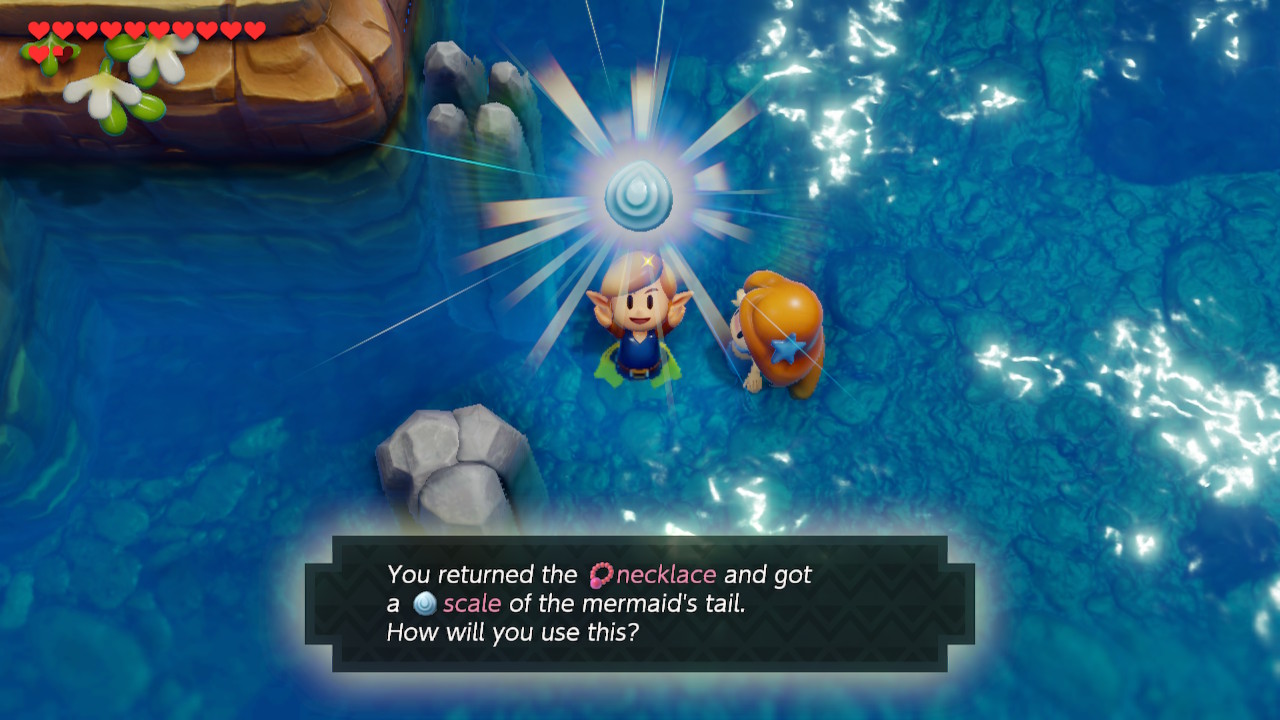
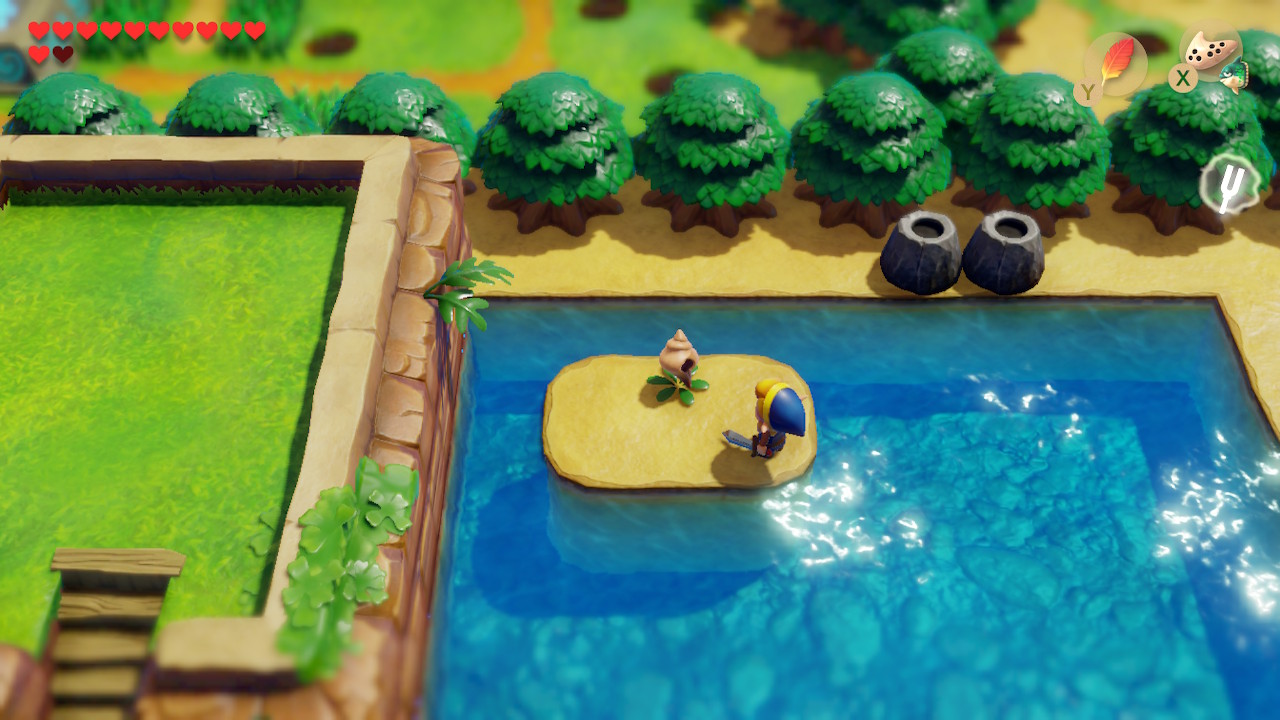
In this same body of water, head north a bit and you'll run into a Mermaid. She'll give you a Scale in exchange for her Necklace back. Swim south here and you'll see a small outlet next to a stone mermaid statue. Dive for Piece of Heart #21 here. Go ahead and exit to land now.

Just south of the phone booth, there's a place to hop into the water with a very small island. It contains a single bush. Go to it and slice it down to find Secret Seashell #36. Head east from here and you'll see a staircase on the other side of some pits and bushes. Use Roc's Feather plus the pegasus boots to jump accross and slice bushes. Go down the stairs and dive in the center of the water to get Piece of Heart #22.

Exit using the stairs to the left to find yourself in a new, closed-off area of Martha's Bay. Use the stairs to your left to find yourself back in a lair of the Li'l Devil. Use some magic powder on the torch here to wake him up. He'll once again curse you, this time with the ability to carry up to 60 bombs. Too bad for you.
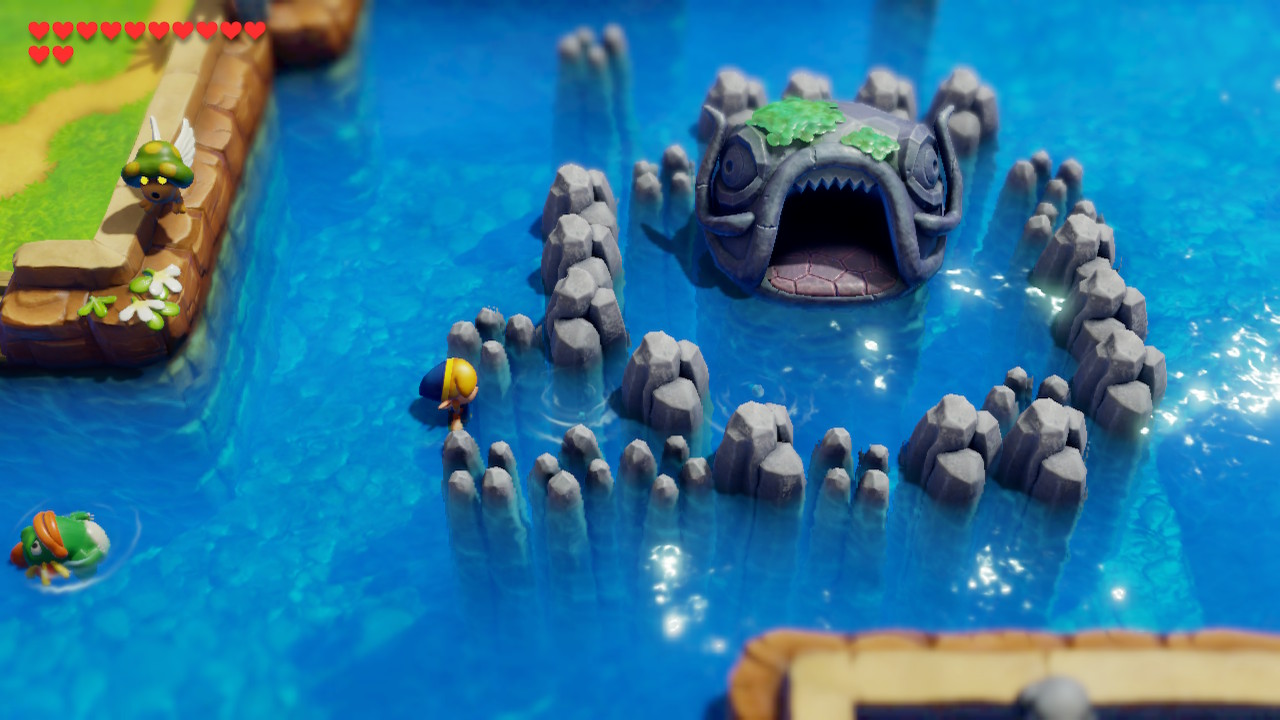
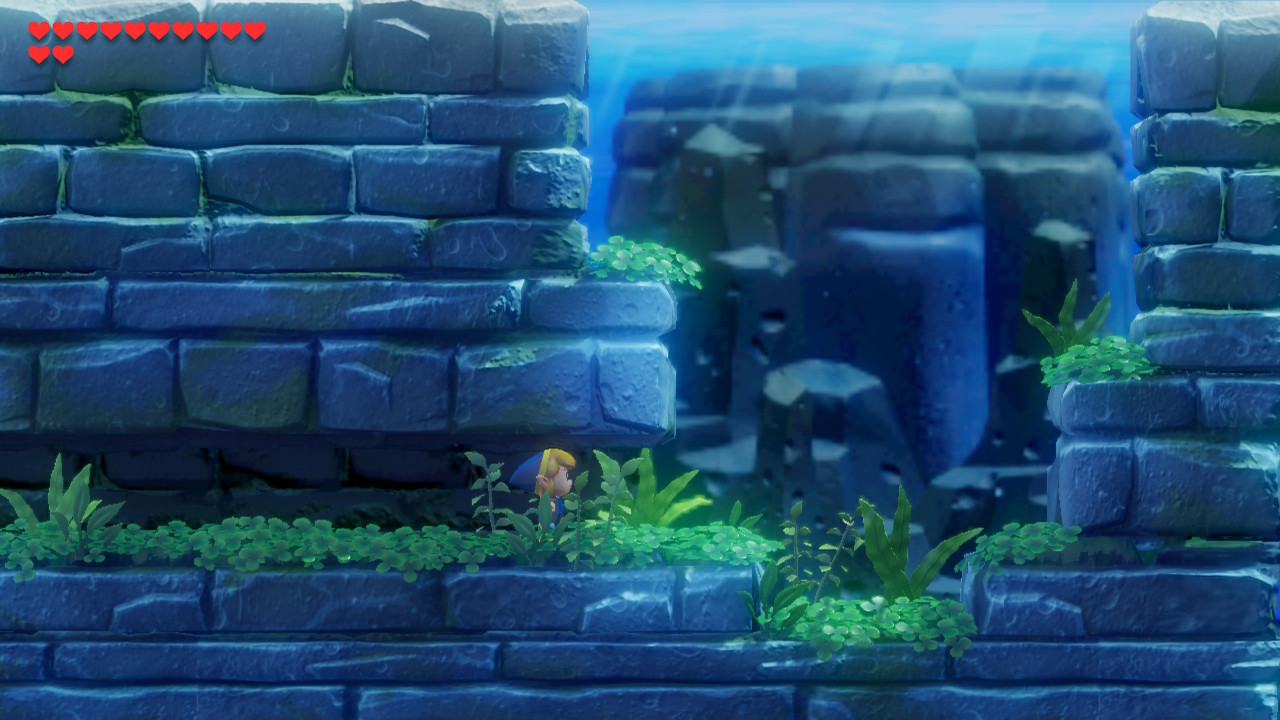
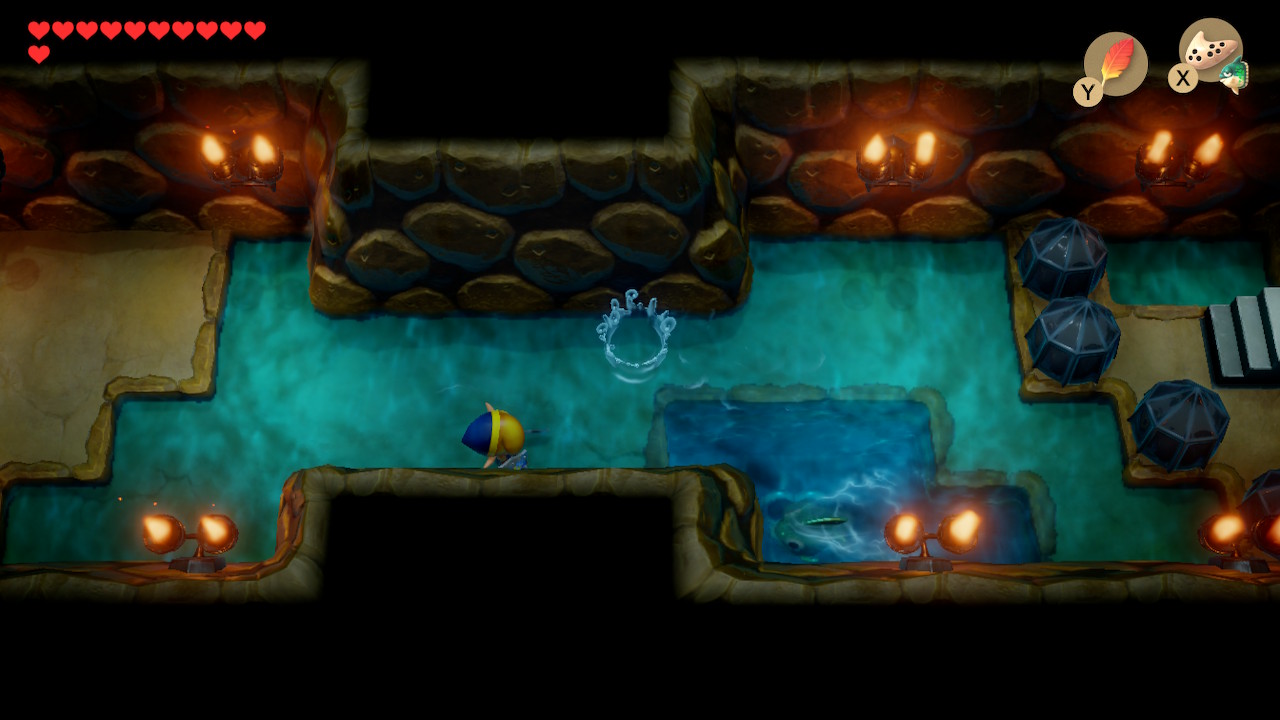
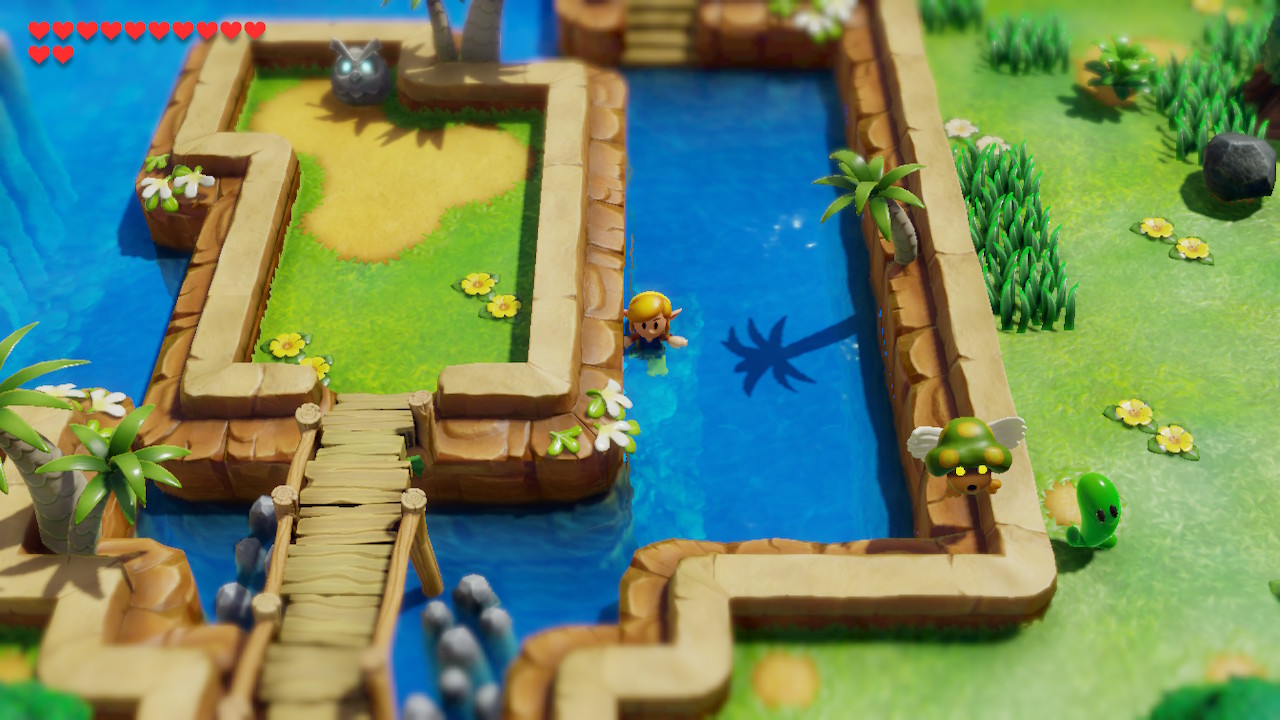
It's now time to head to the next dungeon. Backtrack and hop into the main body of water in Martha's Bay. You'll see the entrance to the dungeon here, but it's blocked off by rocks. There is an area you can swim in where you can see some bubbles. Dive here to enter into a 2D underwater area. Swim right and pop back up to get to the entrance of Catfish's Maw.
Catfish's Maw

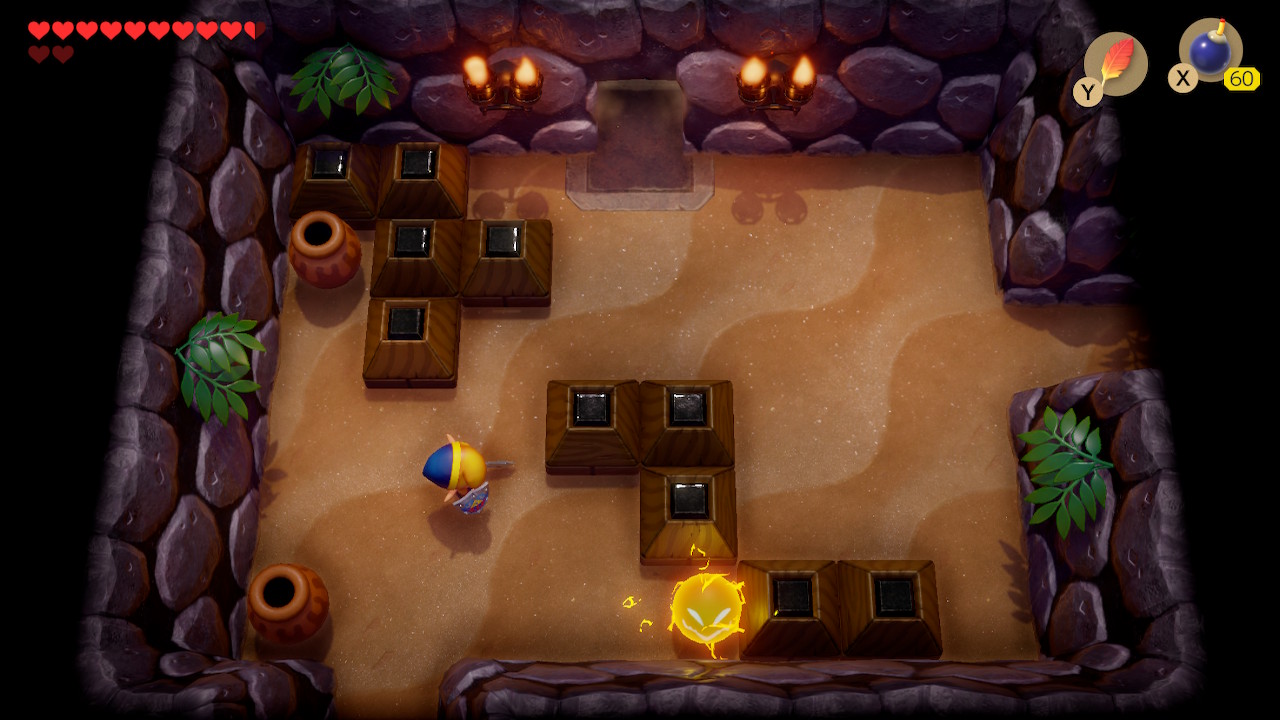
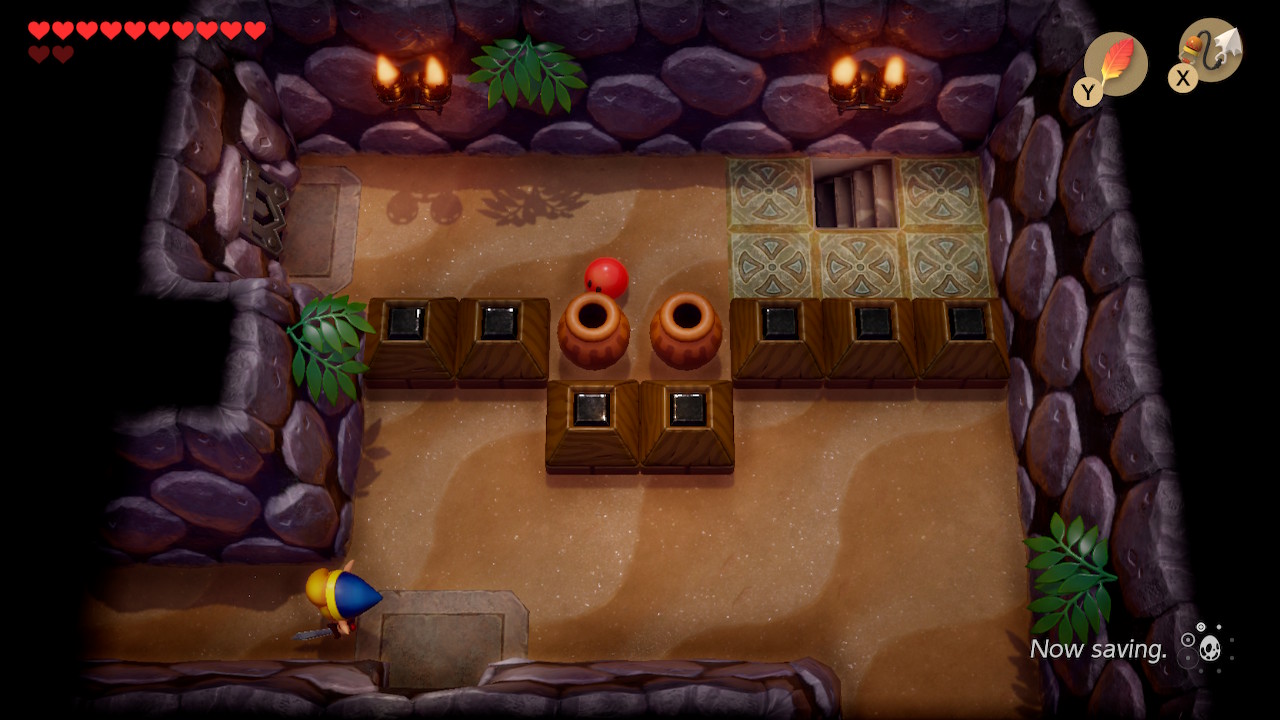
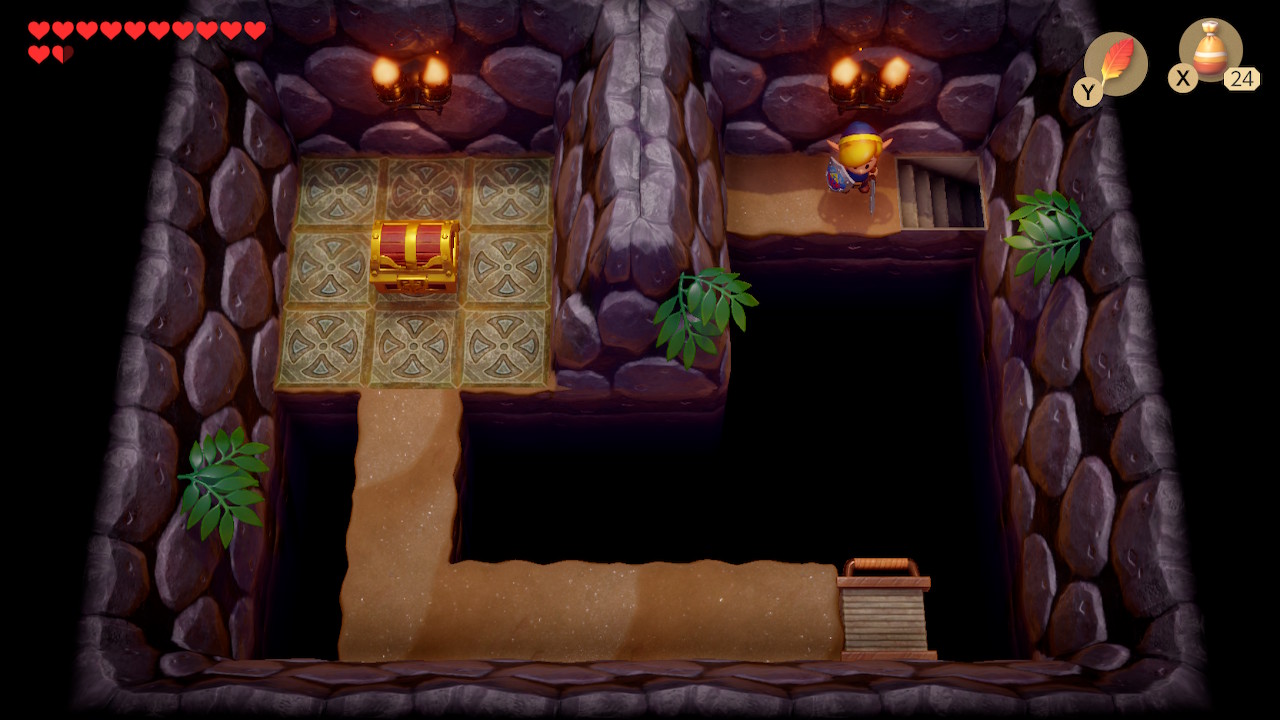
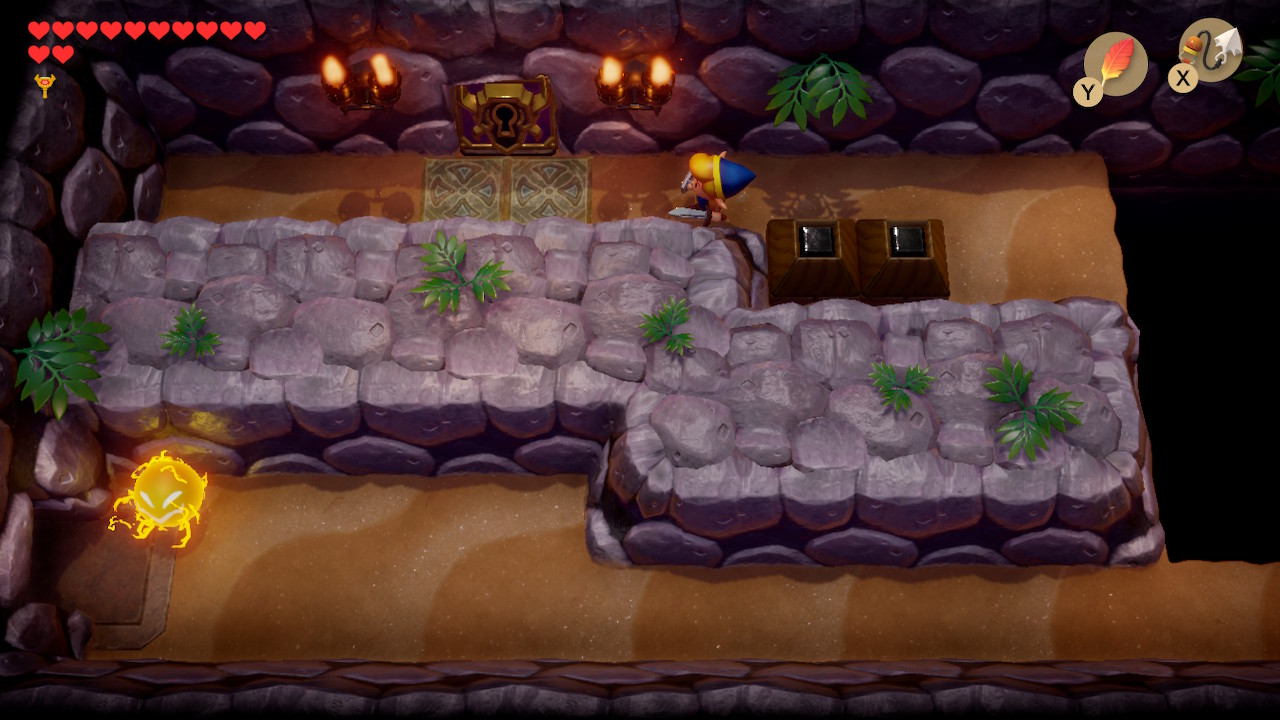
There's only one way to go after you enter Catfish's Maw: left. Defeat the enemies here if you wish and then head left another room. You'll need to defeat all the enemies in this room for the door to the left to open. Go through it to find a treasure chest containing the Compass. Head down the stairs in this room.
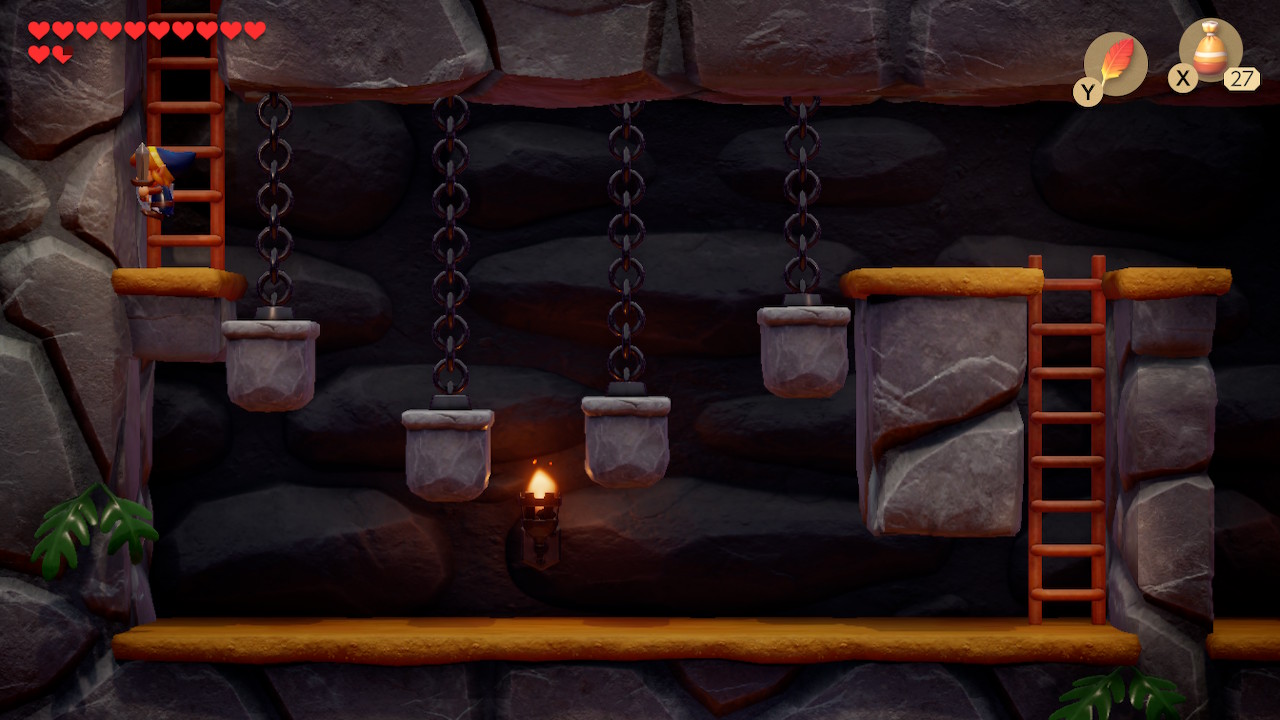
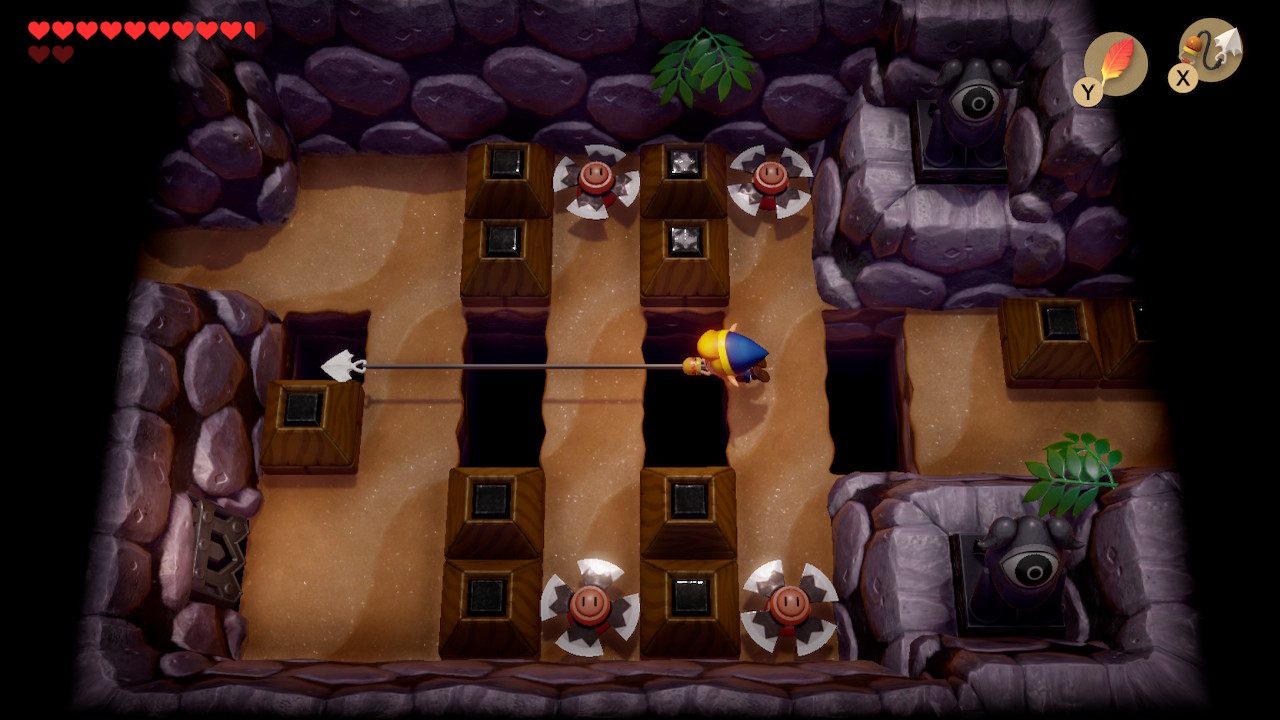
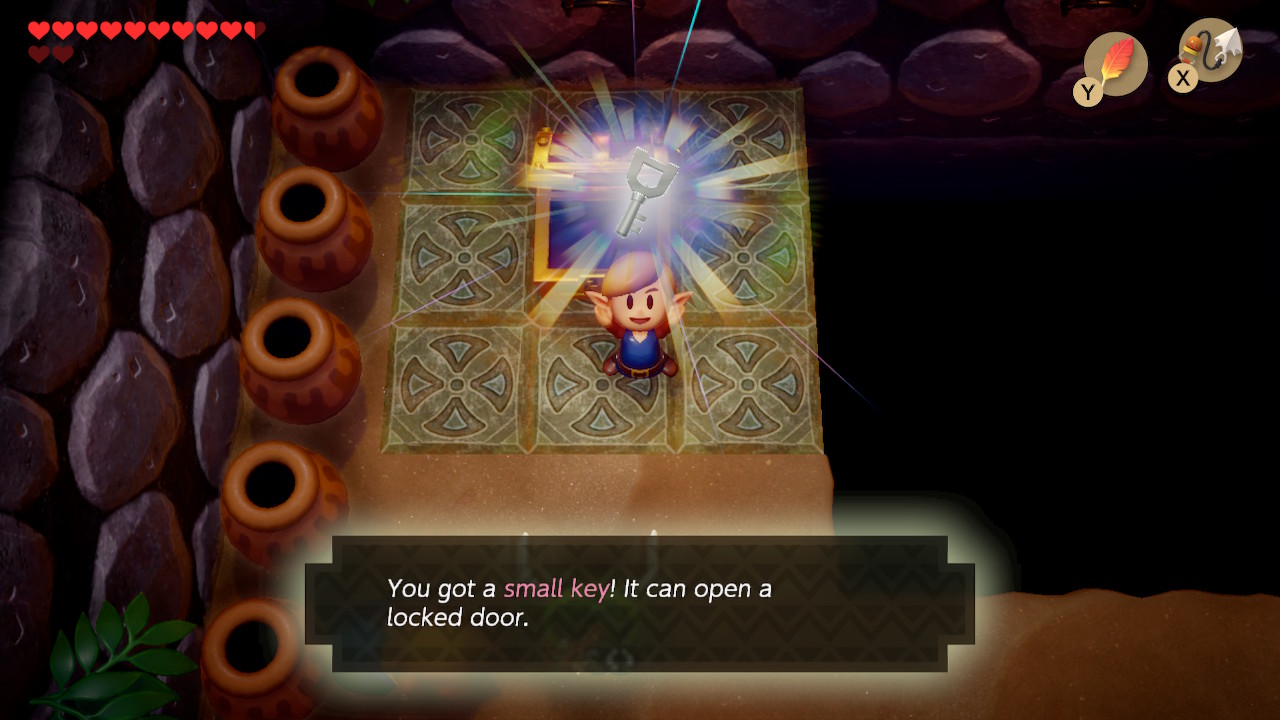
In the 2D basement, there are stone platforms suspended by chains. There is a pulley-like system, so as one moves down the other will move up. Time your jumps well to make it across and head up the ladder to the left. Defeat all the enemies and smash the crystals in this room. Push the two blocks towards each other to form a square and a Small Key will drop.
There's nothing to do in the room to the left for now, so head back down the stairs and backtrack to the room with the chest. Defeat the enemies in here if you haven't to open up the door and head right a room. Use your key on the locked door above. Simply head left into the next room. Watch out for the Blade Traps and defeat the two Iron Masks here to open the doors. Head left into the next room.
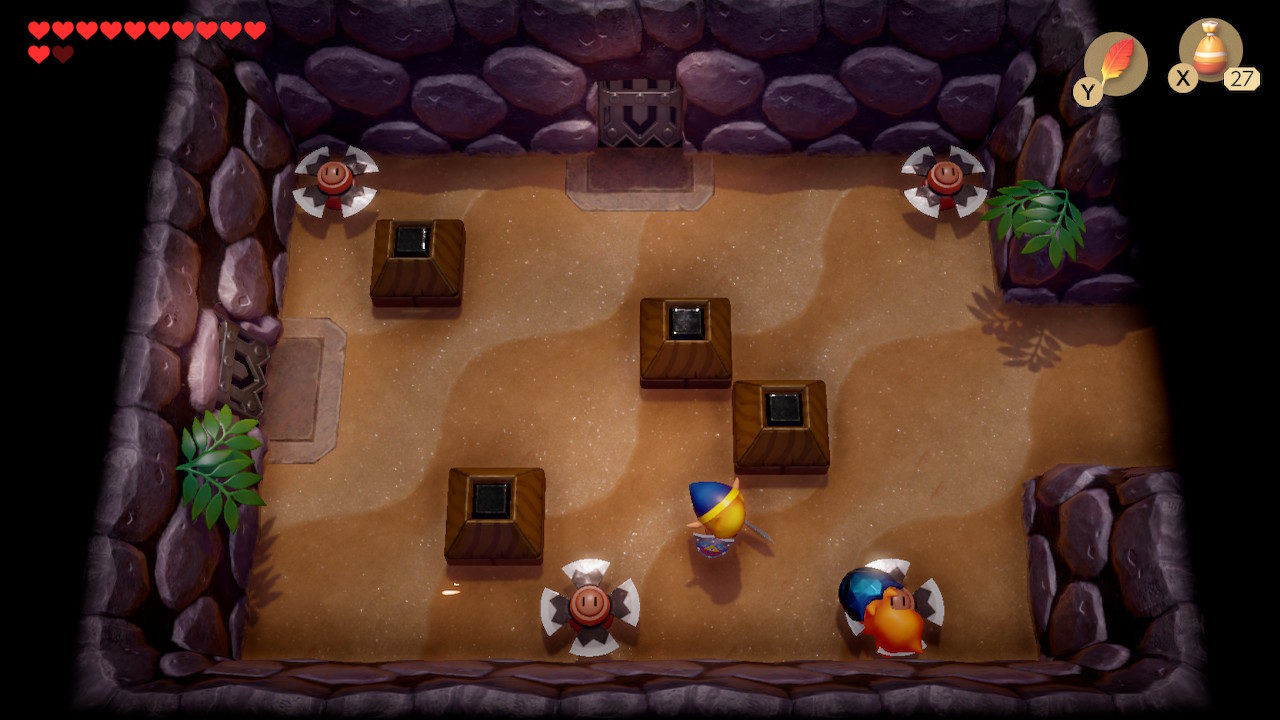
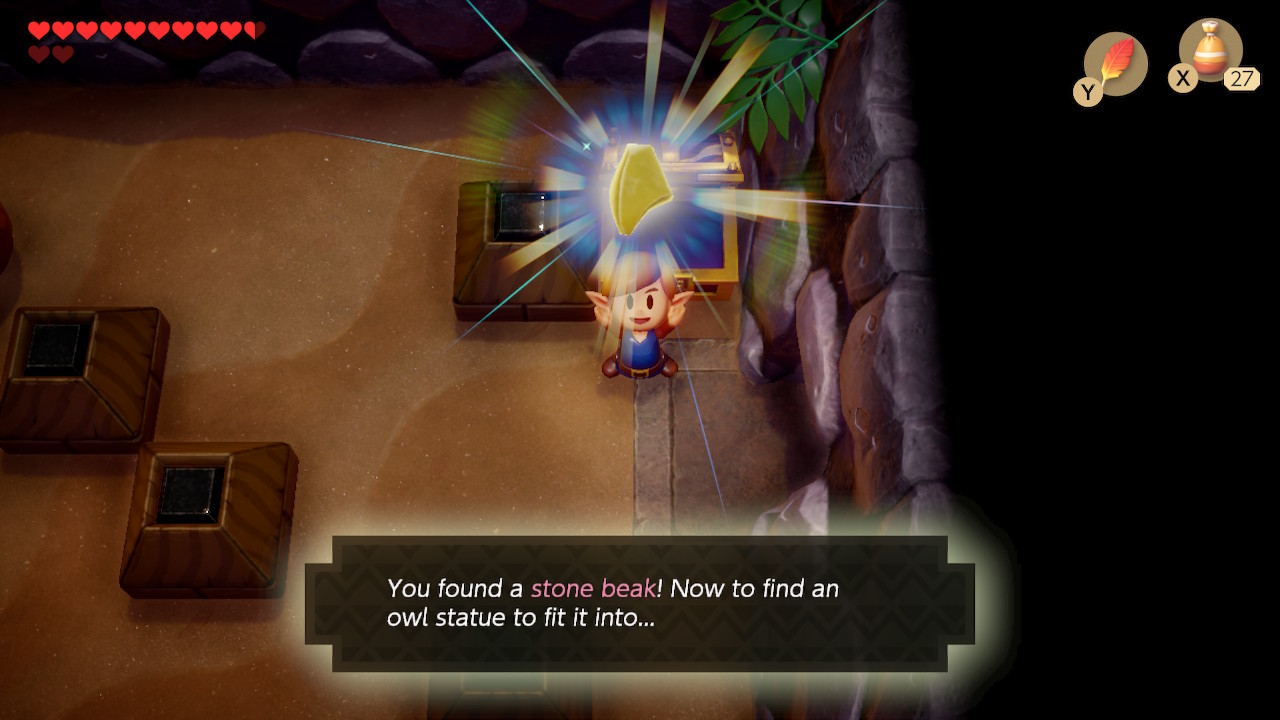
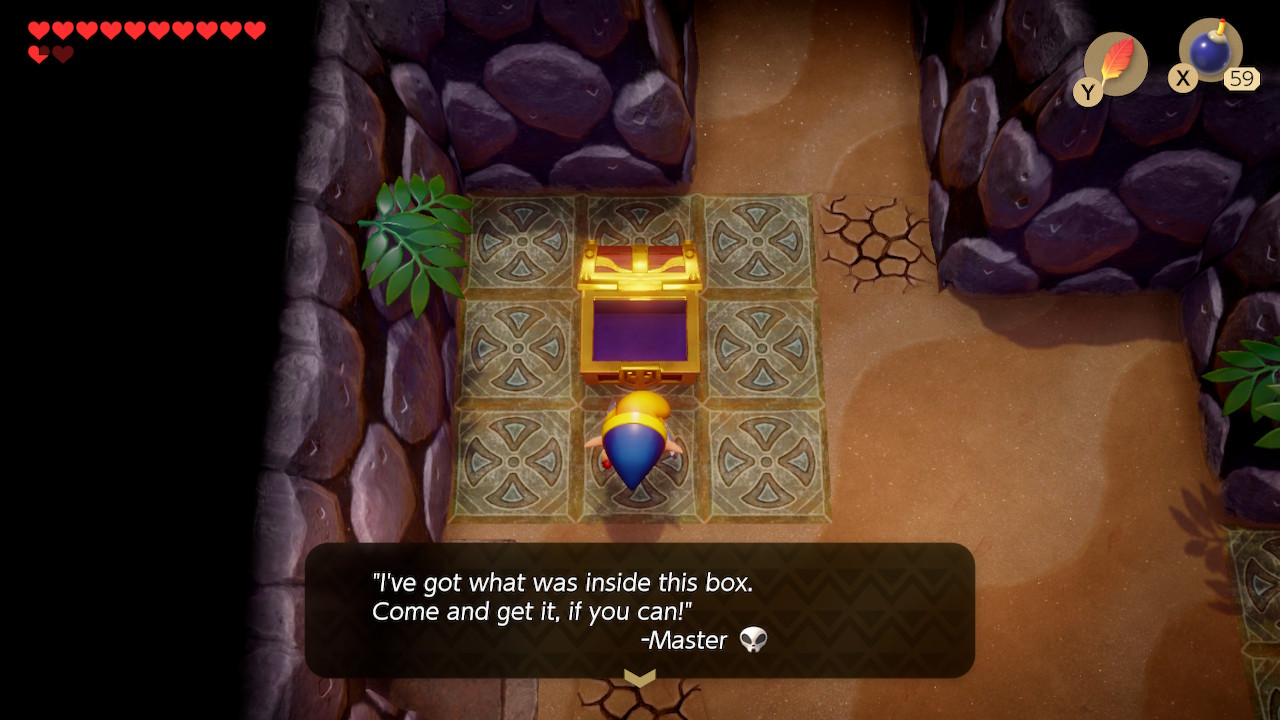
Pick up the bomb drop in here and defeat the two Iron Masks to make a chest appear. Inside you'll find a Stone Beak. Backtrack two rooms to the right. Head up here and you'll find a room with three Stalfos and an owl statue. Defeat the enemies and head up into the mini-boss room.
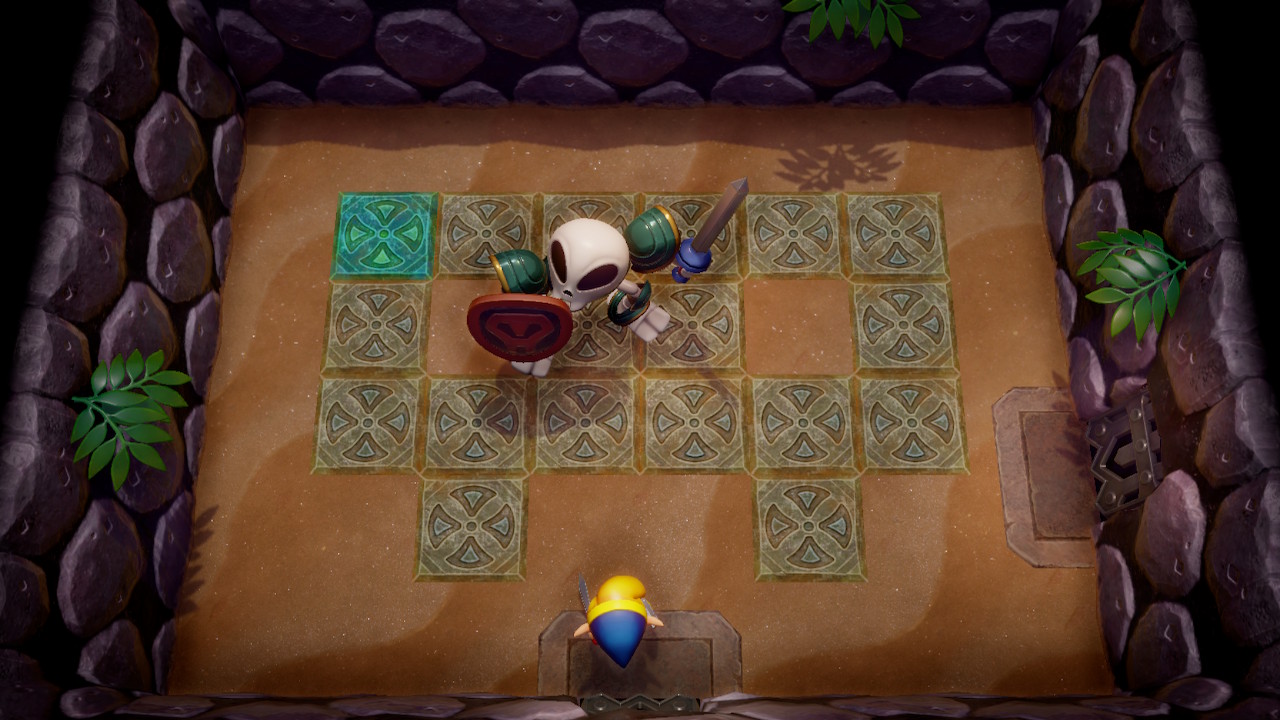
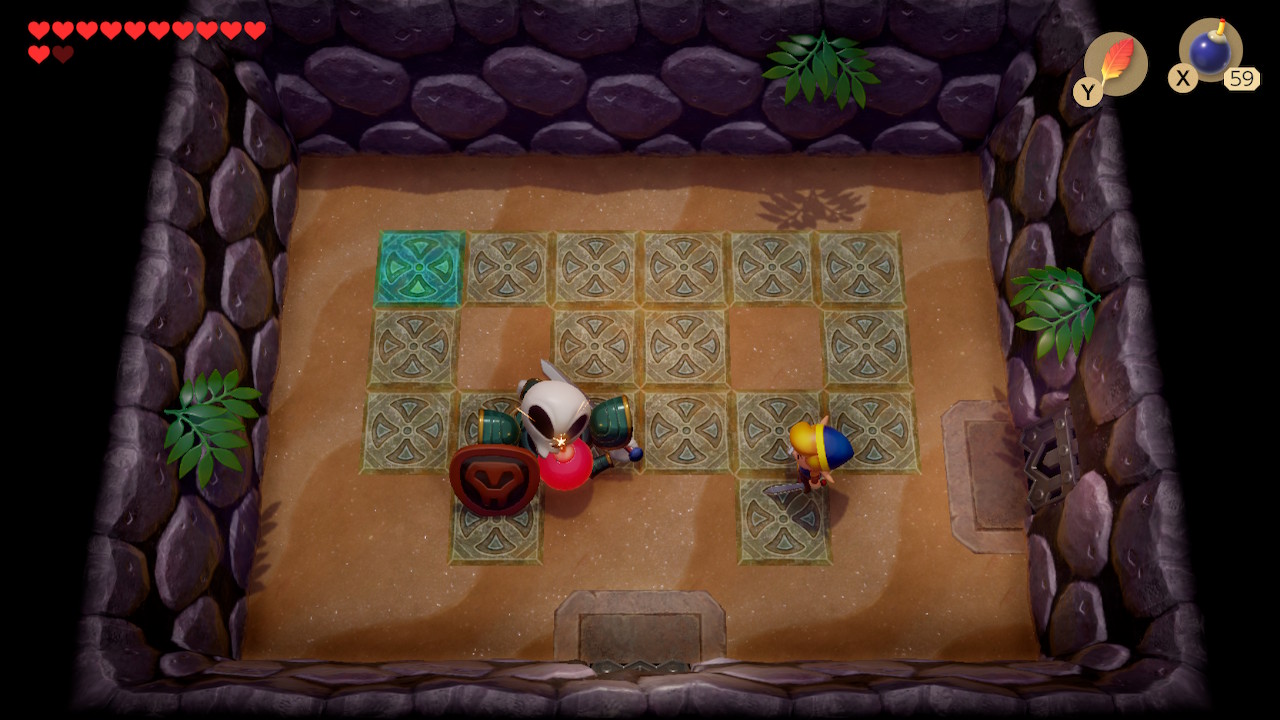
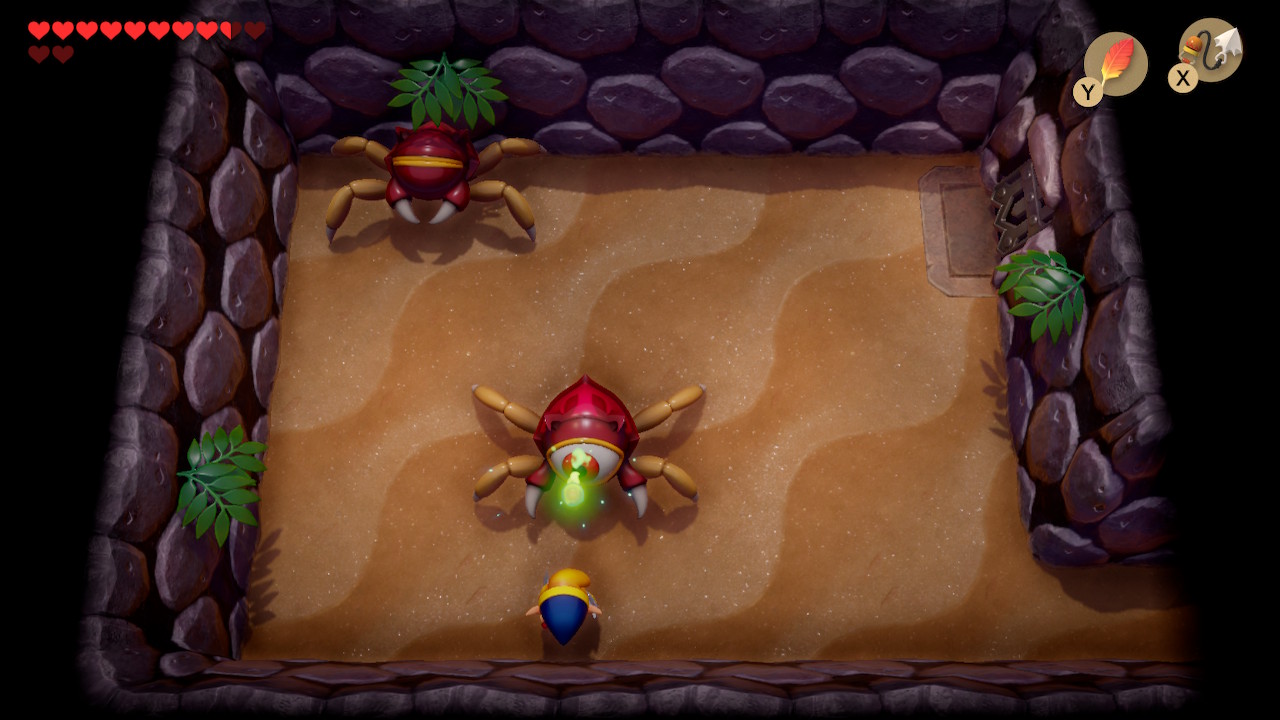
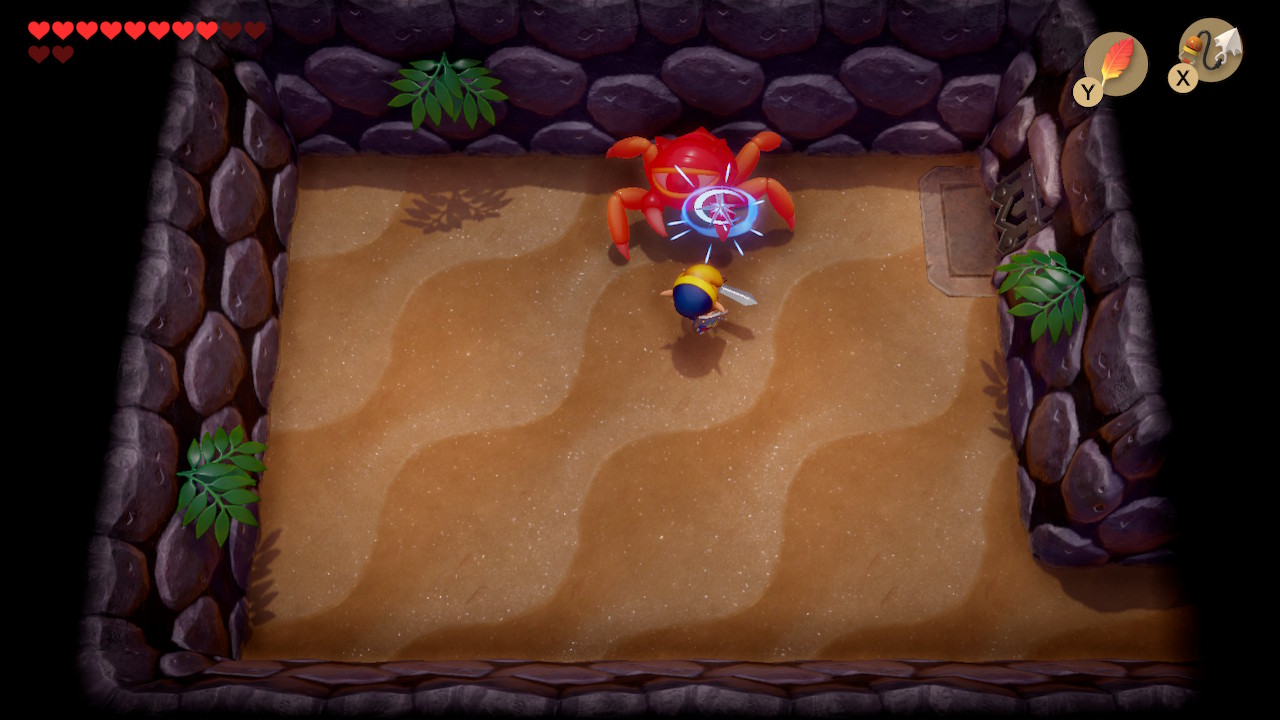
This mini-boss is called Master Stalfos. They key to defeating him was given by the owl statue. After he swings at you, attack him from the side. He'll crumble to the ground, at which point you should place a bomb. Repeat this process several times and he will eventually peace out. Go through the door to the right.
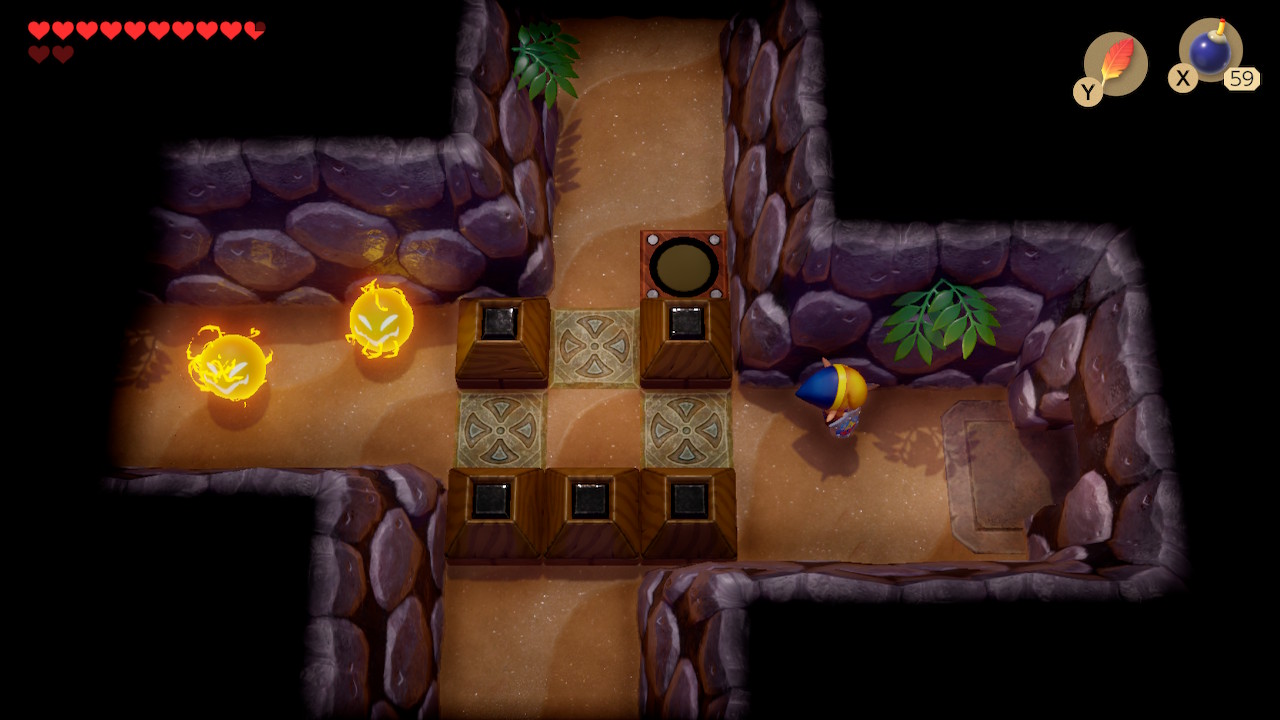
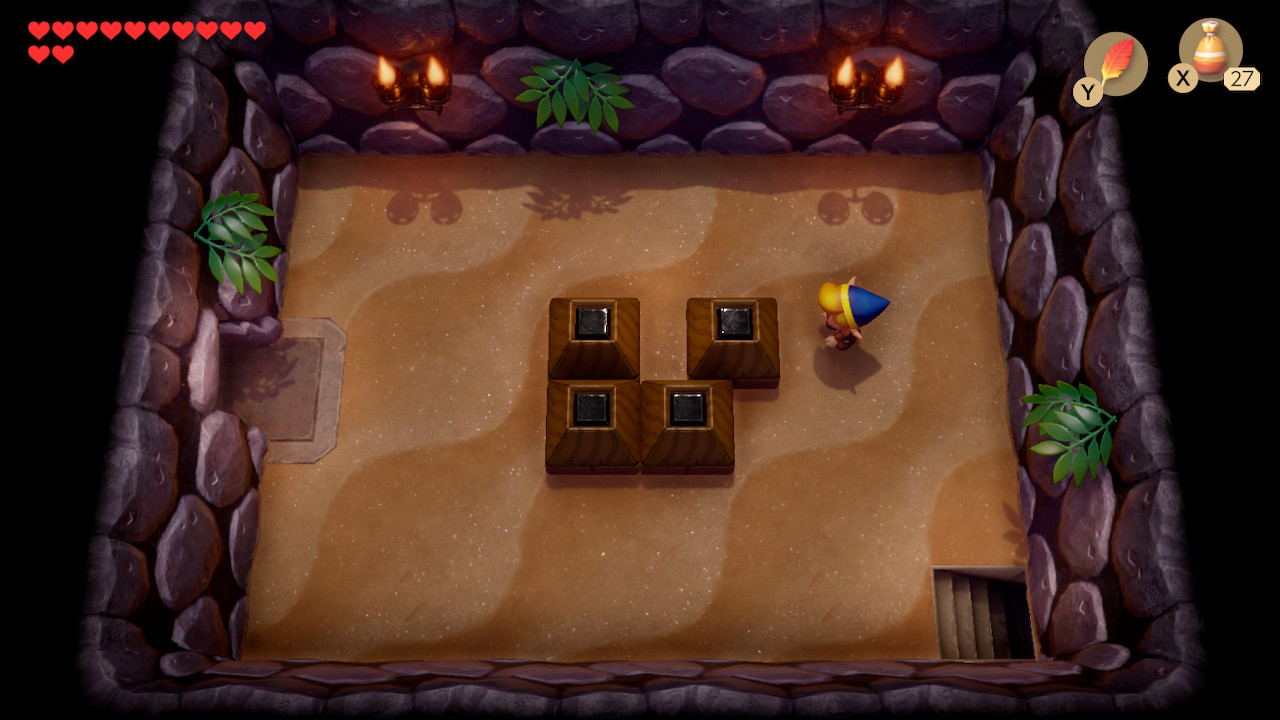
In the next room is a chest, but it has been emptied by Master Stalfos. Head up and push the center block up so that we can head left into the next room. But, turn around. Now push the block right so we can enter the room above. But, turn around. Now step on the switch and push the block down so we can enter the door on the right. Here you'll find Master Stalfos once again.
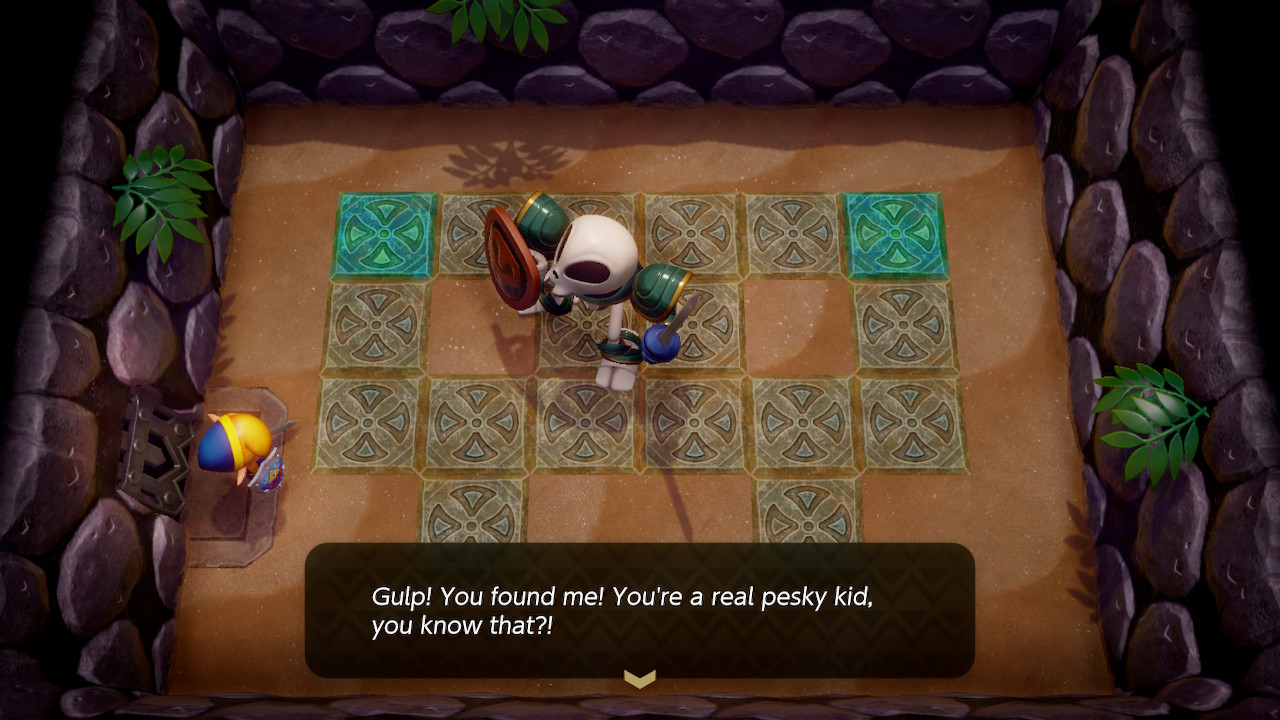
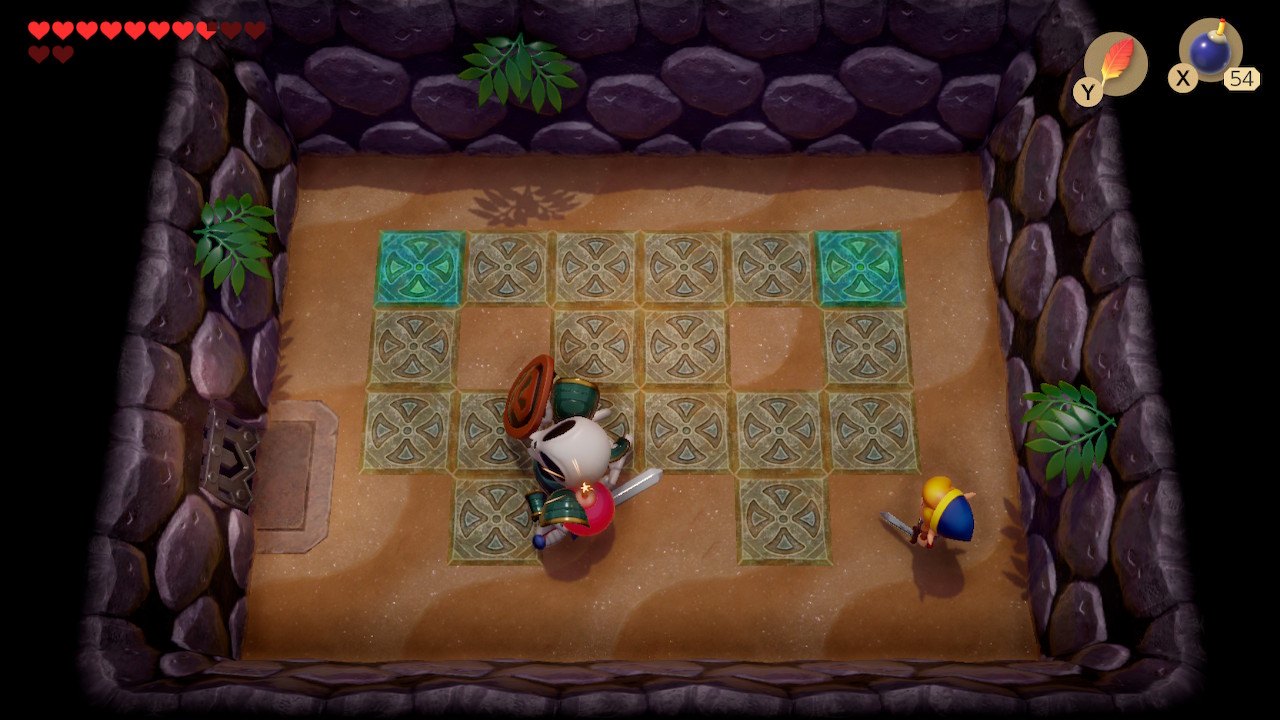
Defeat Master Stalfos in the same way we did the first time. He'll flee from the room once again after three bombings. Now exit this room and push the block to the left so we can head up to the next room. If you need some bombs, visit the room to the right where there is a drop. Otherwise, just take the left exit at the top of this room.
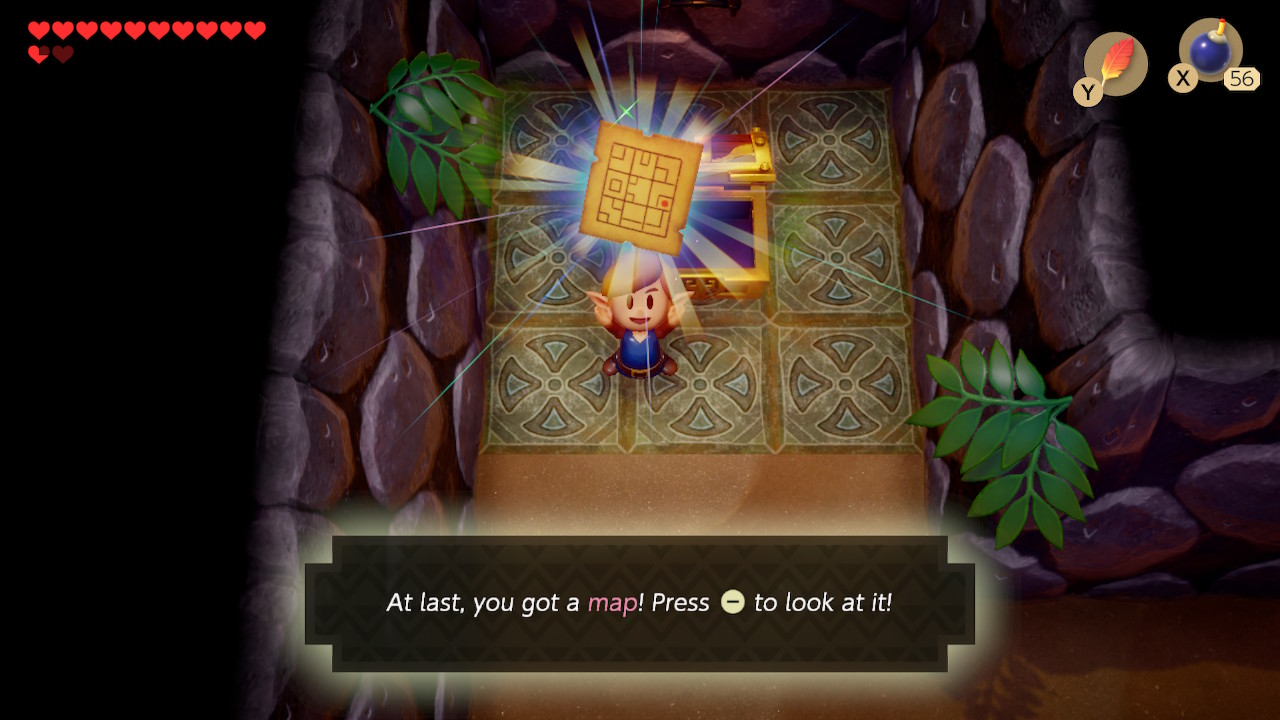
You'll need to defeat all three zol in this room, but one is on the left side. Lift the pot and push a block to the left to get to it. The door above will then open, so head through it. You'll take on Master Stalfos for a third time: rinse and repeat. Aftward go left a room and open the chest to find the Map. We want to get back to the entrance of the dungeon now, so play Manbo's Mambo.

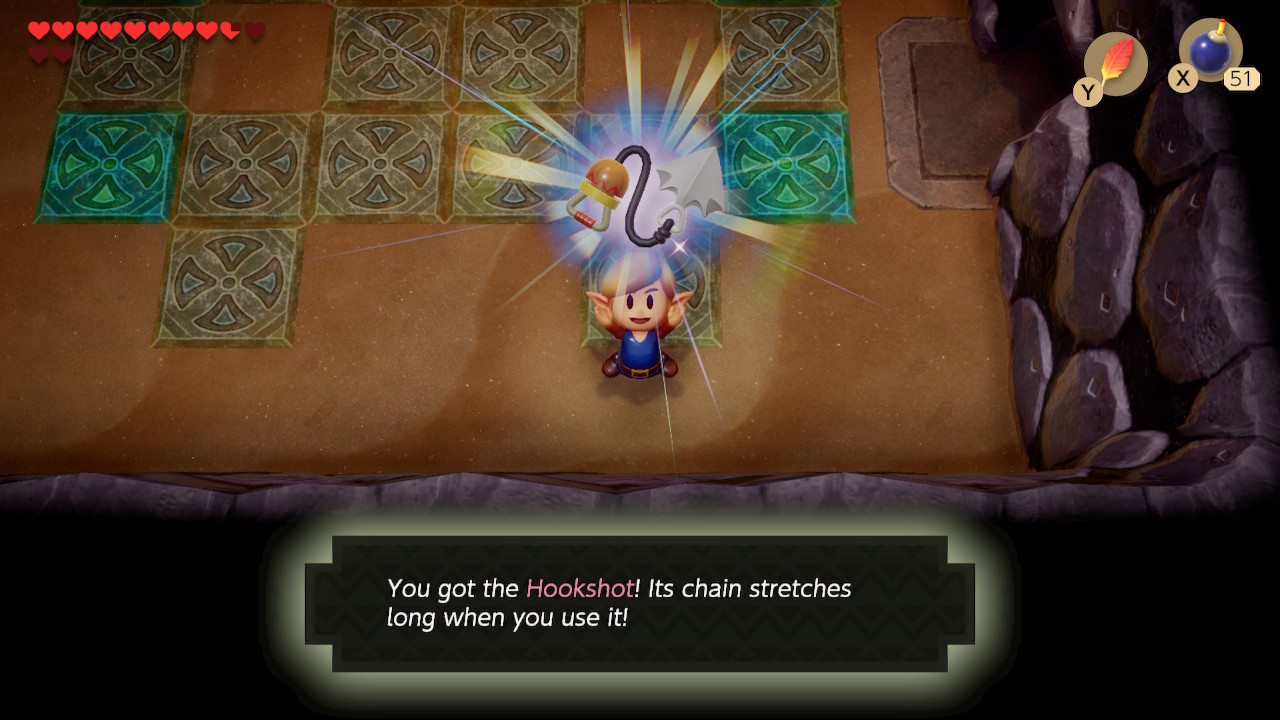
Go left three rooms and head down the stairs here again. Make your way through the pulley platforms and back up the stairs. Then head left to face Master Stalfo's for a fourth time. Same mini-boss, different room. This time, he'll be defeated for good. He'll leave behind the dungeon item (that he stole from the chest before): the Hookshot.
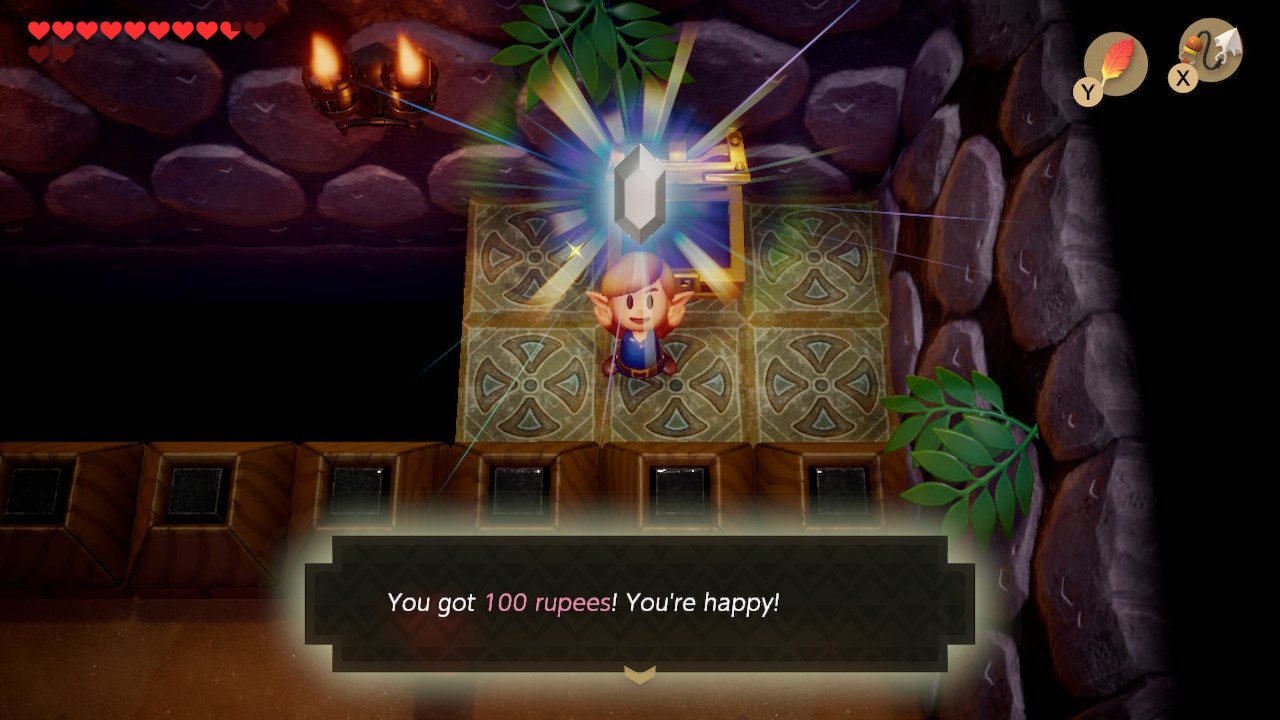
Play Manbo's Mambo again to get to the entrance of the dungeon. Head left two rooms, and then take the narrow northern path to go right. Use your new hookshot to latch onto the chest on the opposite side of the gap. Open it to get 100 rupees. You can also latch onto the blocks to get back to the other side. Exit to the left and head up to the next room.
Enter the room to the left, be careful around the Blade Traps. Go to the room above where you can find an arrow drop if you need it. Head left into the next room and use your hookshot to cross the gap. Head left into a room with a large gap and treasure chest. Hookshot onto the chest and open it to get a Small Key. Exit to the right and backtrack right another room.
We are now headed to face a mini-boss that is entirely optional. The only benefit you'll get is a warp portal back to the start of the dungeon. For the sake of completion, we'll be doing it in the walkthrough. Hookshot the object accross the gap to extend the bridge. Now use your small key on the block to the left, and head left a room.
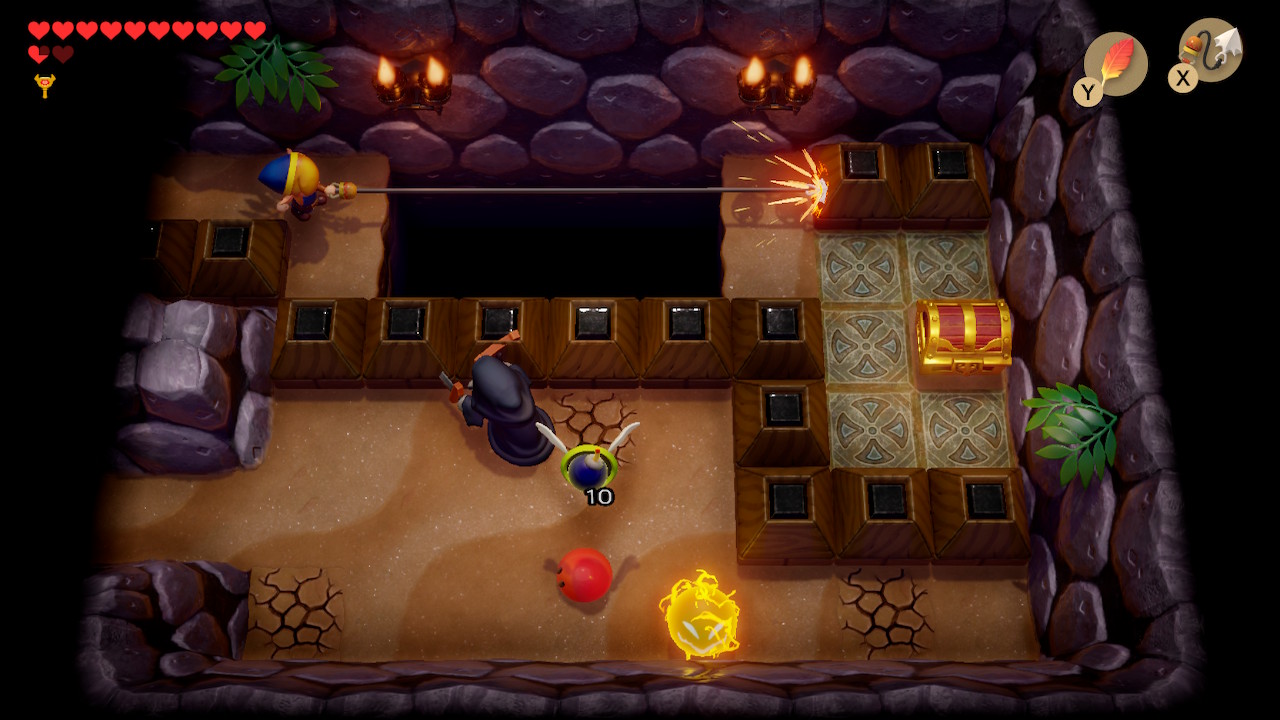
These mini-bosses are two Gohma. One of the two attacks Gohma can do is shoot a fireball out of their eye. When this happens, shield it and then use your hookshot on the eye. The Gohma will be stunned, allowing you to slash with your sword. Once both have been defeated, a fairy will drop and a warp portal will be made. Head right a room and then down a room to where we created a bridge.
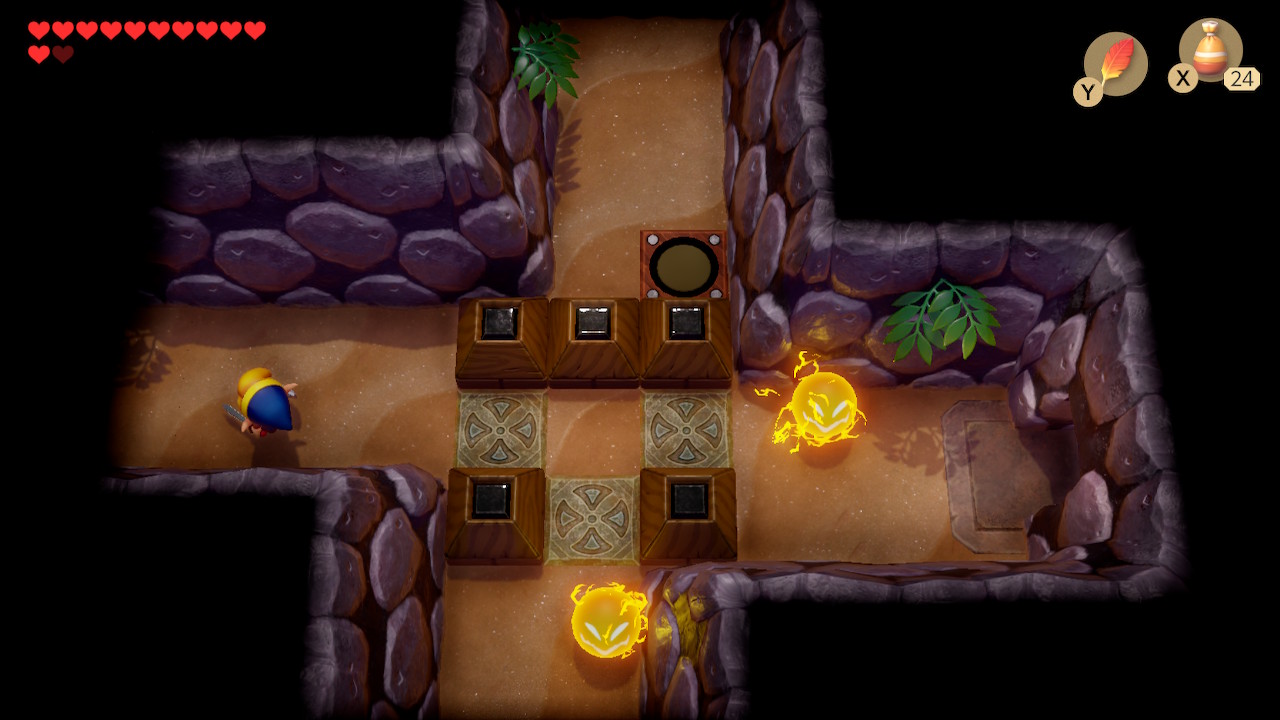

Go down, left, up twice, and right. You'll be just to the right of the first Master Stalfos fight. Head up a room and push this center block up once again. Watch for the Blade Traps as you head into the room on the left. Exit this room above, defeating enemies if you wish. In this next room, jump into the deep water and dive right in the center of it.
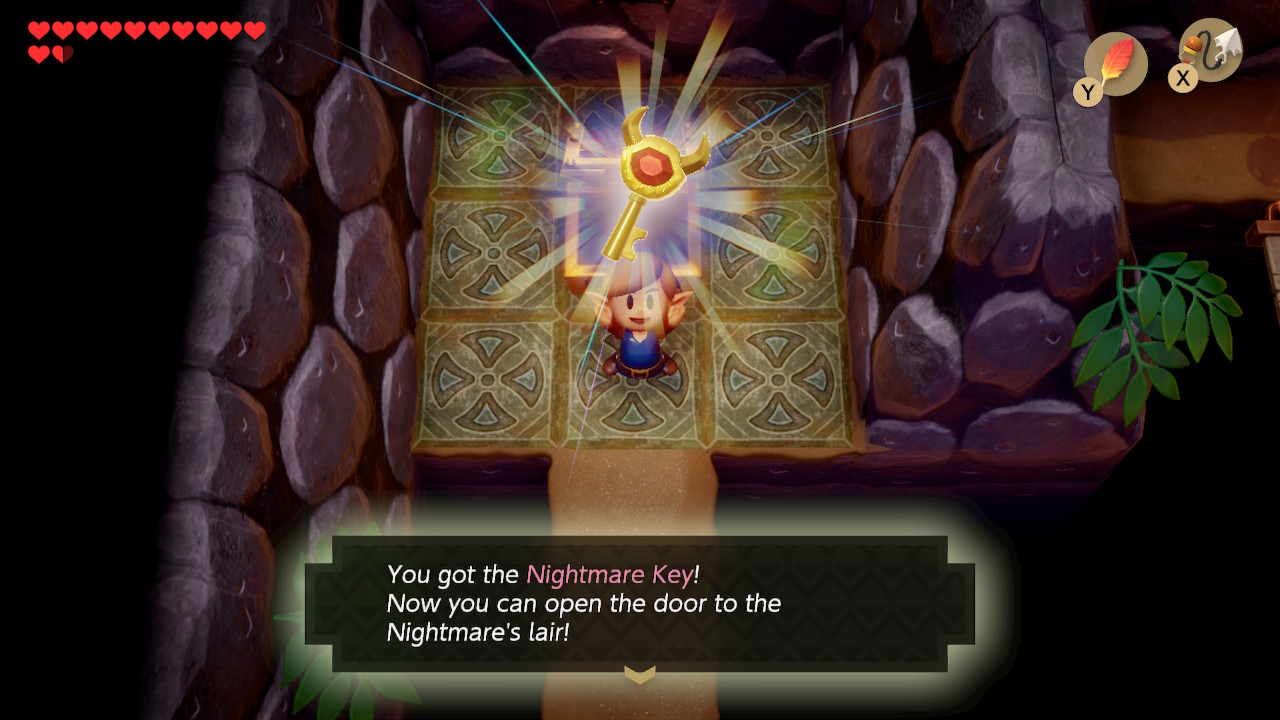
Simply head left and up the ladder in this underwater section, avoiding or defeating the Bloopers. In this next room, use your hookshot to create a bridge. Open the chest to get the Nightmare Key. Backtrack through the underwater room. Now head down a room and right a room, back to the center block. Push it to the right and exit this room above.
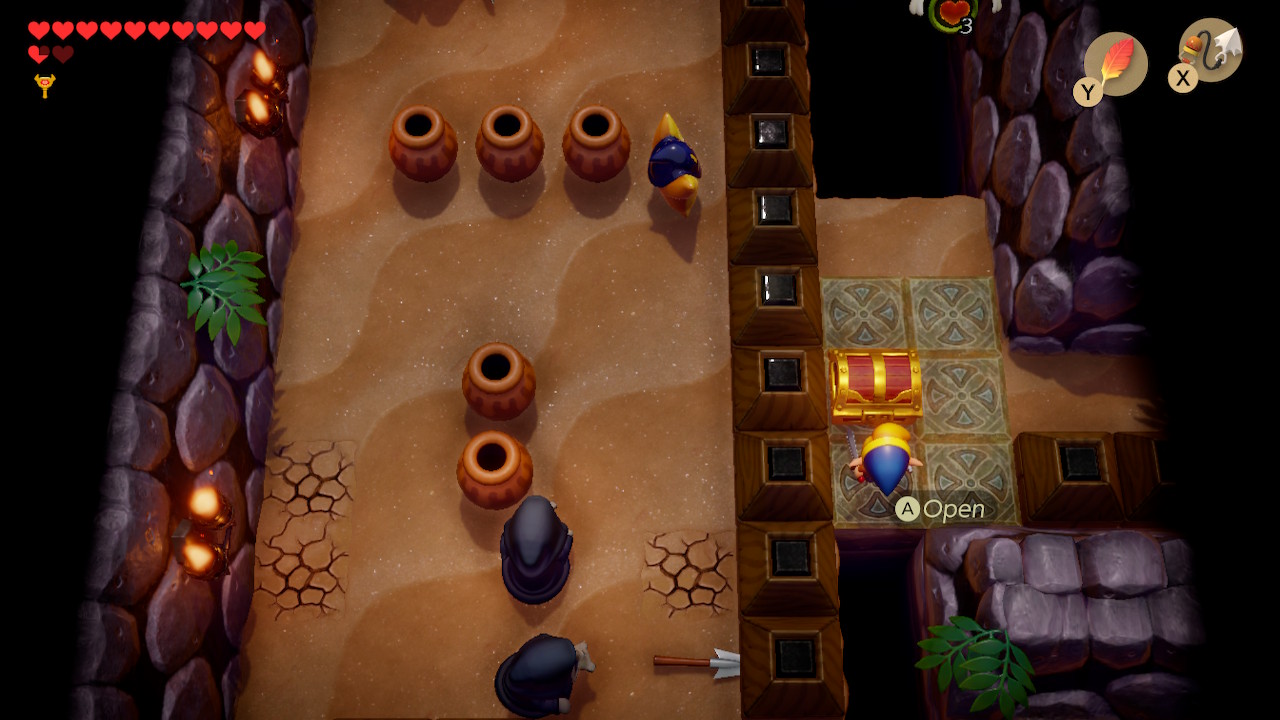
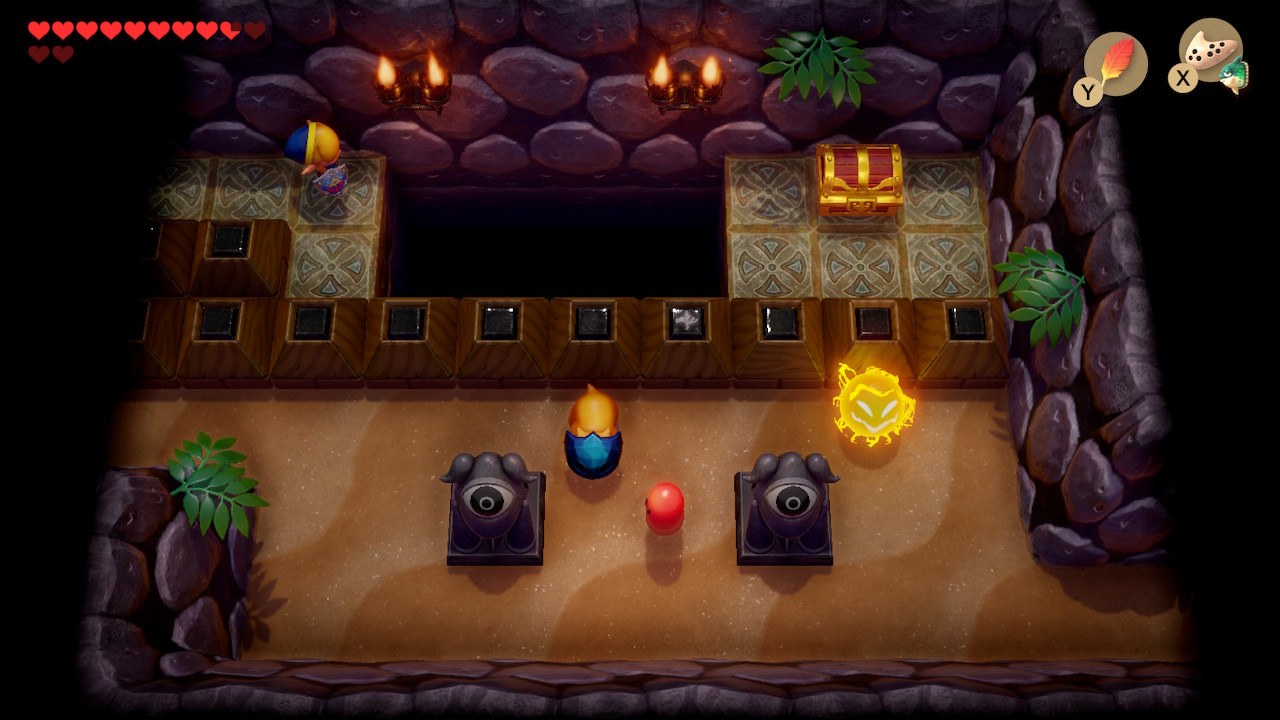
Hop over to the single tile platform and hookshot to the chest to the north. Open it to get 50 rupees. Continue to the right. Use a hookshot in this room as well, again opening the chest here. This time, you'll get Small Key. Head back left and hookshot north to create a bridge. Pick up the heart drop and open the chest for 50 rupees.
Play Manbo's Mambo to return to the entrance of the dungeon. Now, take the warp portal to the room where we defated Gohma before. If you chose to skip this mini-boss, use the room with the central block and head right, continuing through an underwater area. Use your map if you get stuck. From Gohma's room, use the top right exit and go down the stairs.
In this 2D area, head left and use your hookshot on the object above the two short ladders to make your way out of the basement. Use your small key on the block here and use your hookshot to make your way left. Whenever your ready, use your key and enter through the boss door.
Slime Eel
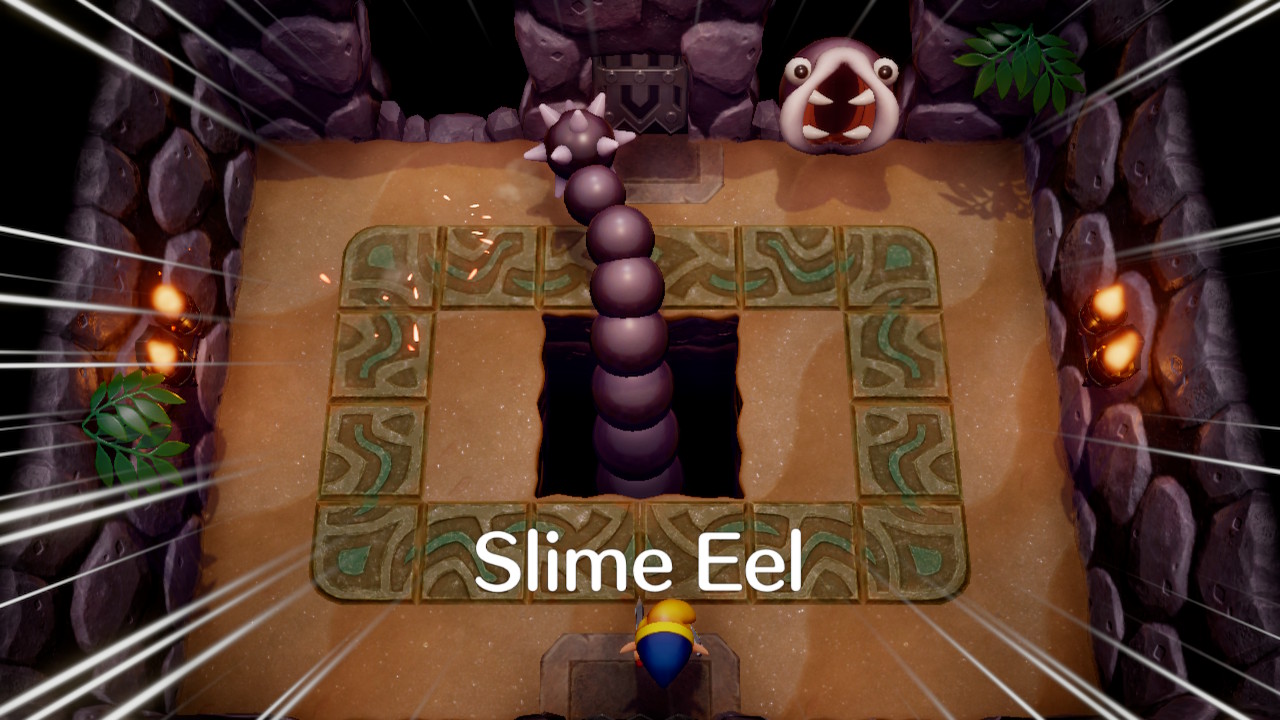
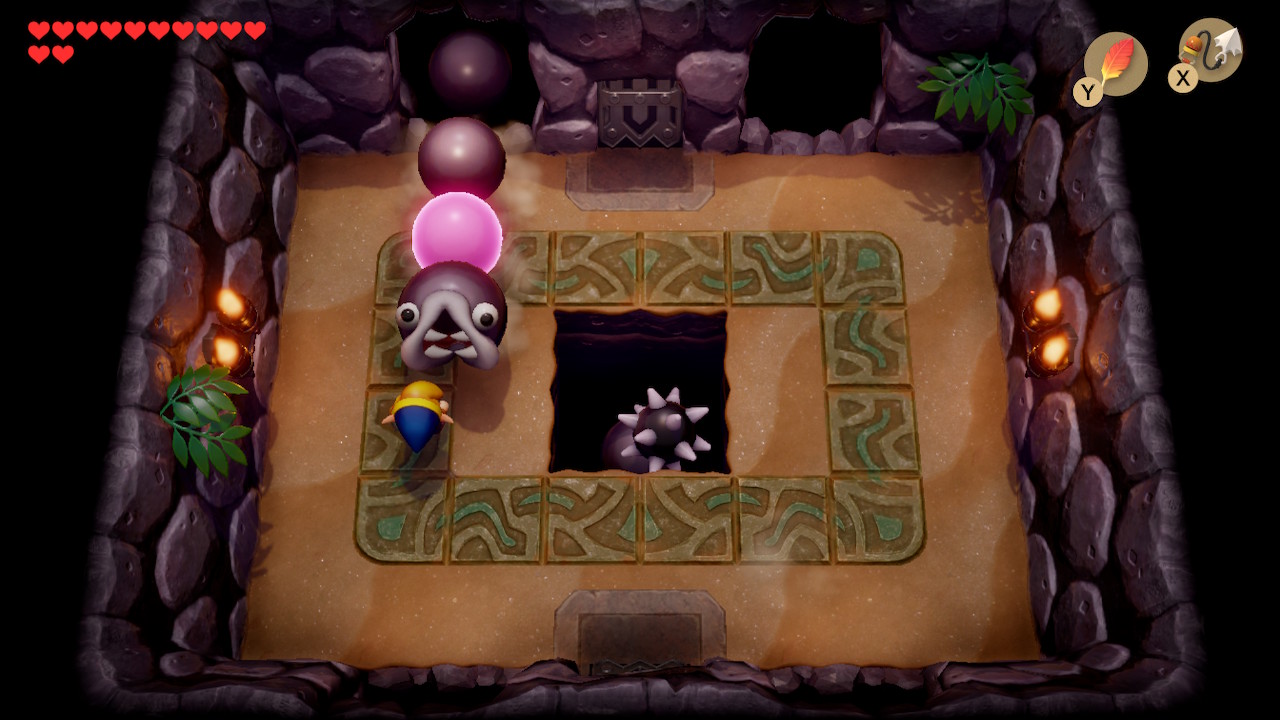
This boss is called Slime Eel. He will poke his head out of four different holes that he made in the walls. When he does so, hookshot his head and then slash away at the glowing segment of his body. Before doing so, look at the pupils of his eyes. If they are white instead of black, this is a "fake head" and you shouldn't use your hookshot.
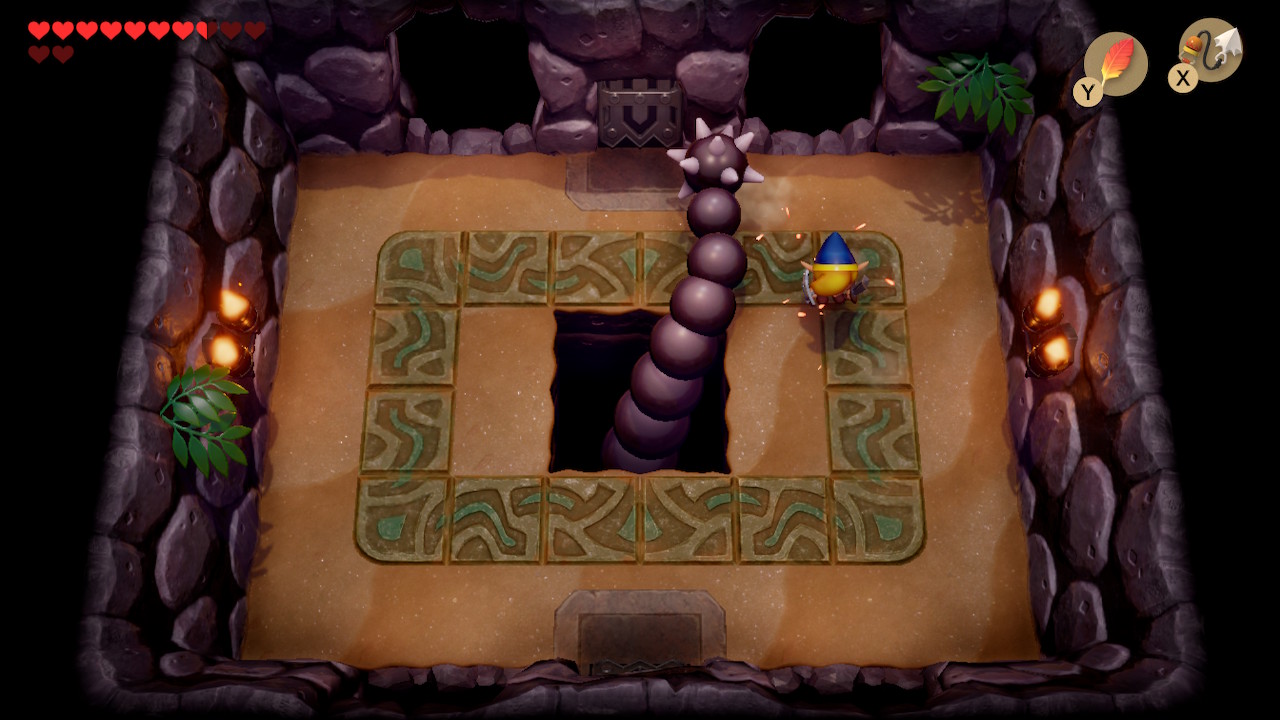
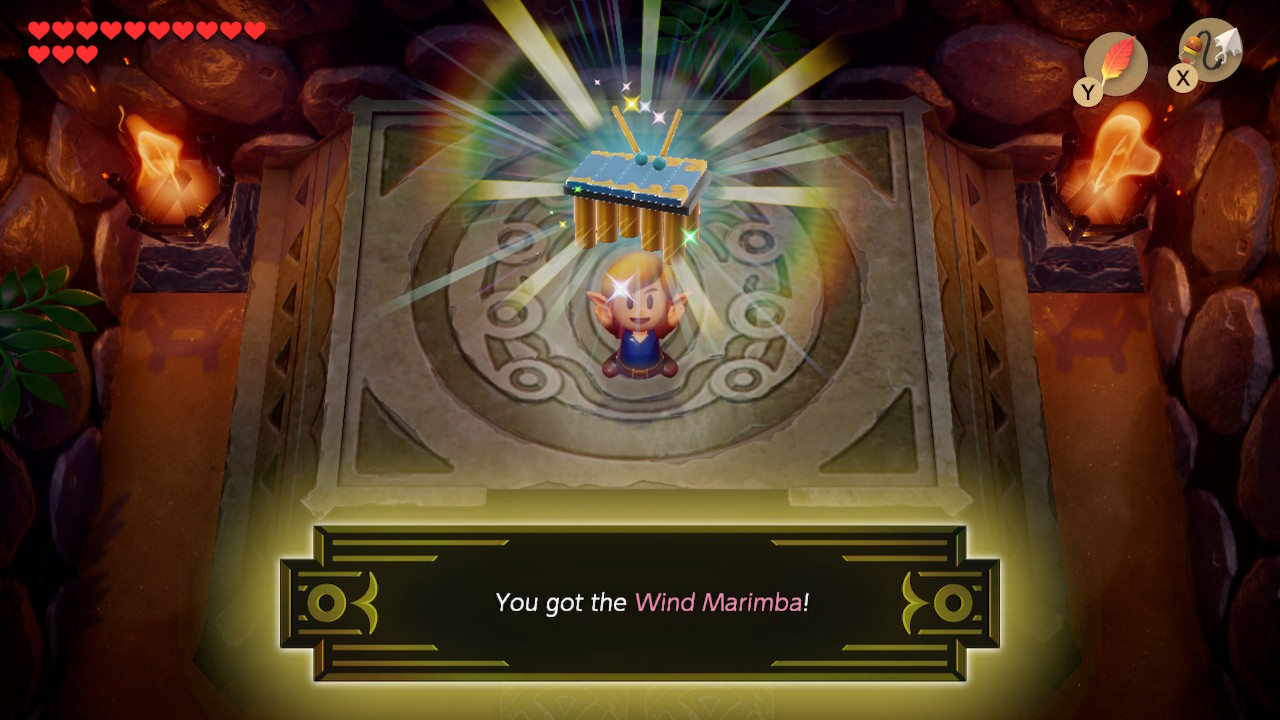
This boss is the most tricky so far, it'll take a lot of patience since you'll need to be quick when Slime Eel opens his mouth to use your hookshot, and his tail can get in the way. After enough slashes, he'll be defeated and leave a Heart Container behind. Enter the room above and grab the next instrument: the Wind Marimba.
Back to Angler's Tunnel Continue to Face Shrine
