
Part 12: Skull Woods
Getting to the Skull Woods
Travel to Kakariko Village and enter the portal on the back of Sahasrahla's house – the one in the northeast corner. Now go east and then north until you enter the forest. Continue north until you find the Skull Woods and proceed through the skull to enter the dungeon.
Skull Woods
After entering the Skull Woods – take the door to the west. Now go south – kill the enemy – and then press the switch far south to open a door back north. Go through this door and then follow the path towards the south – be sure to dodge the revolving flames. Go through the door on the south of the room – Link will now be back outside.
Now go east and then north – fall down the hole to be back in the previous room. Get on one of the moving platforms and merge with the center wall. Travel around until you are on the east side – then pop off onto a platform. Get off on the ledge with the chest. Open it to find a small key. Go east down the stairs and through the door.
Follow the path and go to the east and then south to find a locked door. Use the small key to enter it. Continue south and through the door to go outside. Now travel north and fall down the hole to be back in the Skull Woods. Open the chest to the north for a Silver Rupee and then fall down the ledge to the south – open the next chest for the compass.
Exit through the door to the south and continue going southeast through the door – head south and back outside. Now go north and then west, slightly to the south will be some pink bushes. Cut them to reveal another hole back into the dungeon. Drop down and then enter the door on the west.
Now travel up the wired walkway to the north and bomb the cracked floor. Fall down and head south to press the switch. Go west up the stairs and then go north – bomb the cracked fall and fall down. Open the chest for a small key and then press the switch to the south. Walk across the platform and go back south, west up the stairs, and go through the locked door on the south using the small key.
Now go to the east and pull the lever. A portion of the floor will go down revealing another door. Drop down and go through this door. Merge with the east wall and travel to the south of the room then pop off. Push the two statues onto the first two switch towards the north to create a wall. Now go up the stairs to the west and merge with the wall.
Travel across to the east side of the room using the newly created wall. Pop off near the lever and pull it to reveal a staircase. Now go through the door on the east side of the room. Press the switch to the south and merge with the newly moving platform. Ride to across to the east and pop off. Go north and stand underneath the switch above you until the hand drops onto it pressing the switch.
Unlocking the Dungeon Portal
Now use the newly moving platform to go to the ledge to the north and then press the switch. Go through the door to the north. Press the switch and kill the enemies. Now use the hand in a similar manner to before to have it kill the enemies in both of the northern corners. This will reveal a portal as well as unlock the door to the north.
Go through the door and then travel west up the stairs. Get onto the golden platform and ride it west – get off near the locked door and go down the stairs to the west. Now wait until the platform gets near Link and get on. Ride it to the chest on the east and then open the chest for a small key. Ride the platform back to the west, get off, and use the small key to go through the locked door to the east.
Go to the west once entering the room and light the torch on the west wall. Kill the mummies to unlock the door to the north near the torch. Go through the door and continue north through the next door. Now merge and slip through the cracks on the south wall. Go east and merge with the far east wall. Travel towards the north and pop off near the eye.
Pick the eye up and throw it across to the eye holder. Now travel back across the gap and throw the eye into the eye hold to reveal a small ladder across the gap to the south and a big chest. You cannot get the chest yet so head across the gap to the south. Continue making your way south using the platforms – merge with the far south wall and slip between the cracks.
Getting the Master Ore
Go through the door to the south. Now head all the way north, go east, and then south to find some pink bushes. Cut them to reveal a hole back into the dungeon and fall down. Merge with the east wall and travel north – pop off at the next ledge. Travel across it to the west, go south across the walkway, and continue west to find a big chest that contains Master Ore.
Now travel back to where you fell through the hole and merge with the south wall. Travel across to the west side, pop off, and pick up the eye. Carry the eye back to the north using the platforms and throwing it across any small gaps – this is easily accomplished by throwing the eye onto the moving platforms and merging with the wall, going across to the other side, and then waiting on the eye.
Once getting the eye back to the eye holder – toss it in to lower down the platform with the big chest that contains the Big Key. Slip back between the cracks to the west and go through the door to the north. Go through the door to the south and go east to find the boss door. Use the big key to enter it and prepare to fight the dungeon boss.
Skull Woods Boss: Knucklemaster
In order to defeat the Skull Woods Boss - you must attack the palm of the hand that is actually an eye. To do this Link must merge with the wall when the hand goes to punch him. This will stun the hand and allow Link to attack it with his sword. After several times the hand will turn purple. Link must now dodge it when it tries to squash him by merging with the walls. Now once the hand tries punching Link – merge and it will hit the wall stunning it. Attack it with the sword and repeat this several times until the Skull Woods boss is defeated.
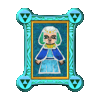 Now grab the Heart Container and go through the door to the north. Free Sage Seres from the painting and watch the cutscene. Now go through the portal and travel back to Link's house to stock up on more items.
Back to Part 11: Turtle Rock | Continue to Part 13: Desert Palace
